Fairy gardens have become a popular way to add a touch of magic to your outdoor space.
Whether you have a sprawling garden or a small balcony, creating a fairy garden is a delightful and creative way to bring nature and imagination together.
These enchanting little spaces transport you into a whimsical world where fairies, gnomes, and tiny houses reside amidst lush greenery, colorful flowers, and sparkling accents.
If you’re ready to turn your garden into a magical retreat, here are 12 enchanting fairy garden ideas that will help you create your own miniature fantasy world.
#1. Fairy Garden in a Basket
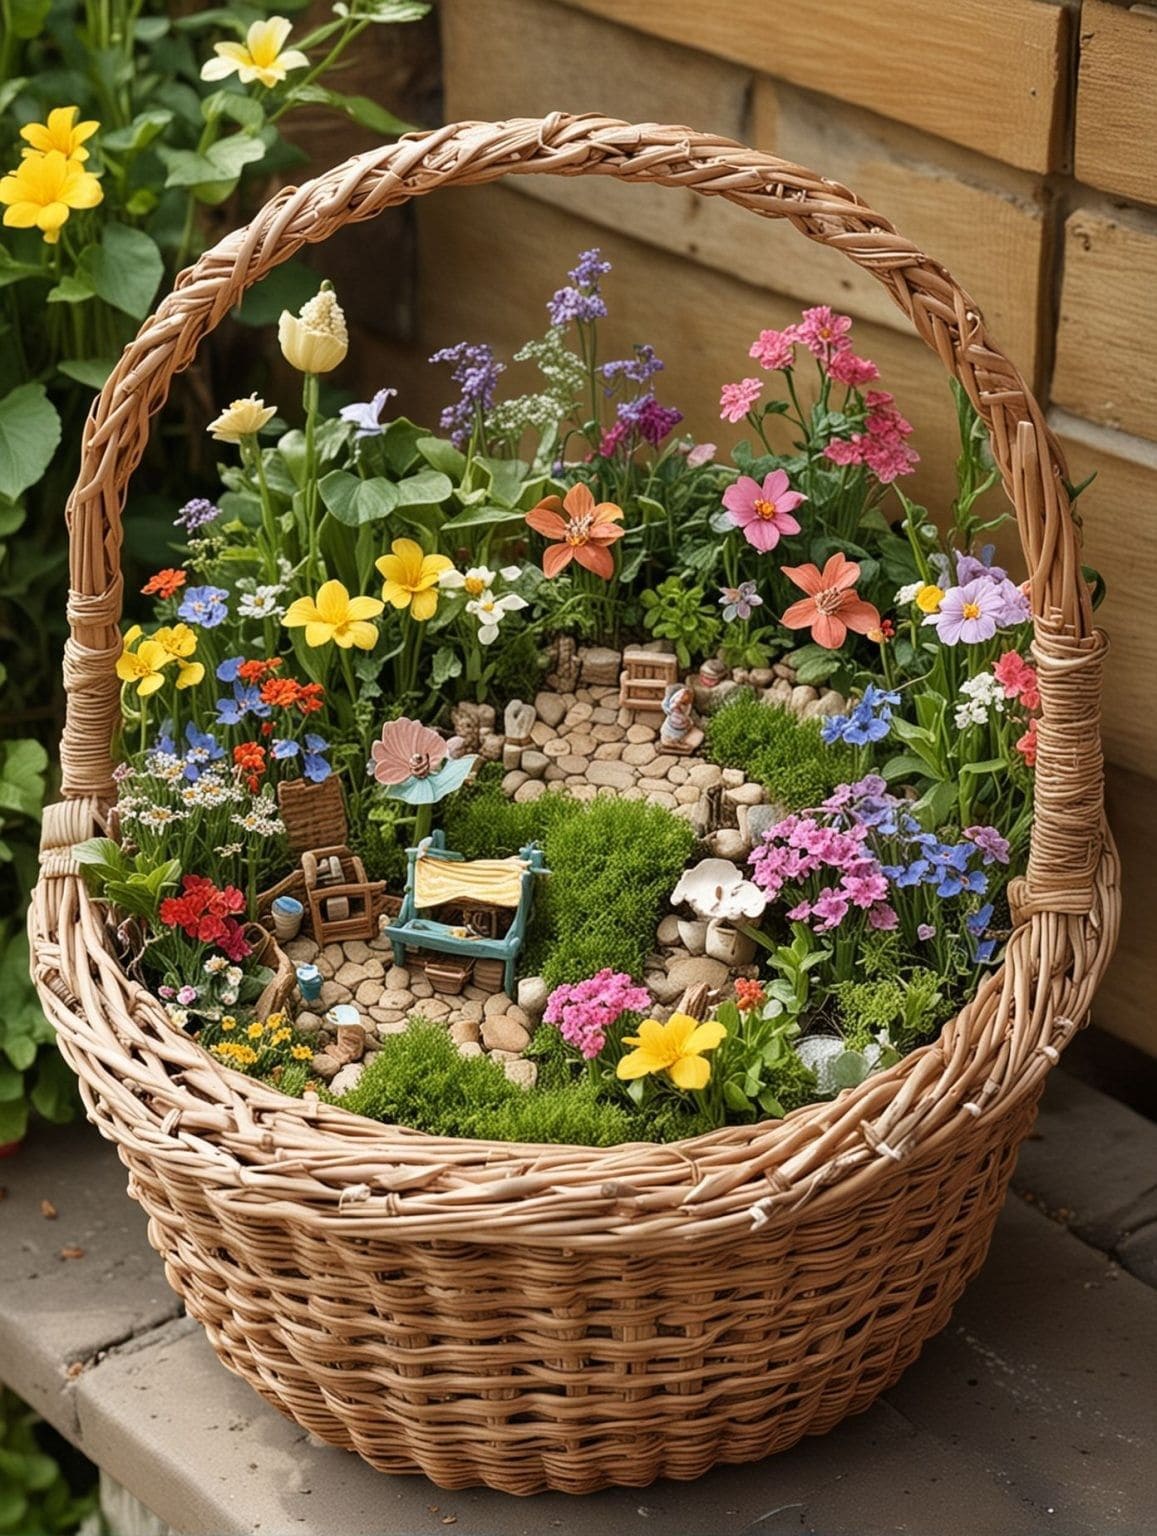
By creating this whimsical fairy garden in a basket, you bring a playful touch of nature to any space.
This charming scene features colorful flowers surrounding a cozy little village, complete with miniature furniture and stone pathways.
The delicate combination of vibrant flowers and carefully placed moss creates an inviting and enchanting atmosphere.
It’s perfect for those who want to enjoy a magical, miniature garden that can be easily displayed indoors or outdoors.
Materials Needed
- 1 medium-sized wicker basket
- Assorted small artificial flowers (around 4-5 different colors)
- Small pebbles or stones (1 bag)
- Artificial moss (1 bag)
- Small fairy figurines (2-3 pieces)
- Miniature furniture (1 small chair, 1 table, 1 swing)
- Small gardening tools or other tiny accessories
- Potting soil (1 small bag)
Step-by-Step Guide
- Begin by placing a layer of potting soil inside the wicker basket, filling it to about half its height.
- Create the garden paths by laying out the small pebbles or stones in a circular pattern to mimic a rustic path.
- Arrange the artificial flowers around the edges, making sure to vary the colors and heights for a natural look.
- Add moss between the flowers and stones to create a lush, green ground cover.
- Position the miniature furniture in the center, ensuring the fairy swing and bench are well-placed.
- Place the small fairy figurines in strategic areas, such as by the swing or next to the flowers, to complete the look.
#2. Gnome Garden with Pathway
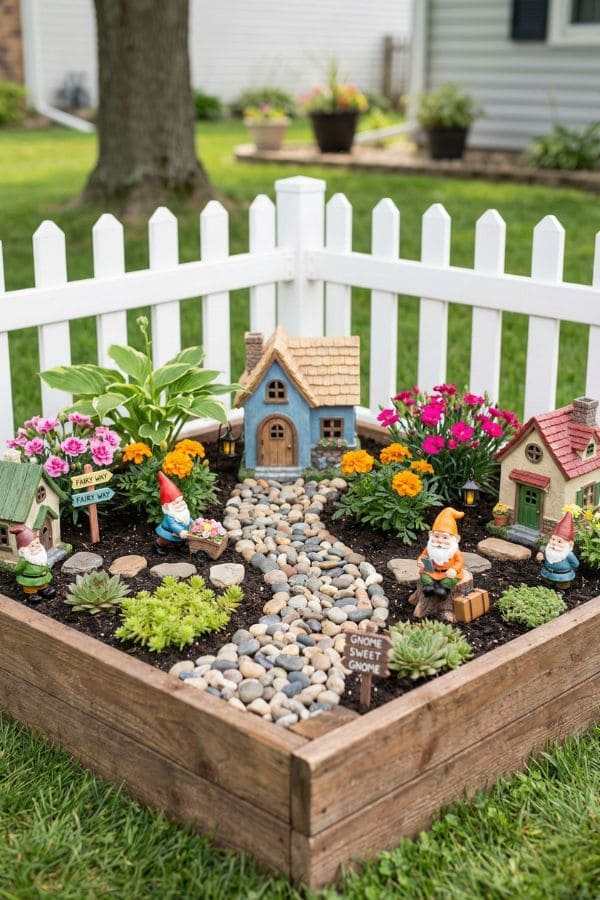
Your fairy garden can have a charming and welcoming touch with this gnome-themed garden.
This little area is enclosed with a white fence, offering a cozy home for small figurines like gnomes and tiny houses.
The playful “Gnome Sweet Gnome” sign adds a whimsical feel, while the stone pathway connects the various elements of the scene.
Vibrant flowers brighten up the garden and provide a lively touch against the rustic wood box, which serves as a base.
Materials Needed
- Wooden garden box (1, 2×2 feet)
- Small decorative houses (2-3)
- Gnome figurines (3-4, 2-4 inches tall)
- Small garden signs (2-3, with messages like “Gnome Sweet Gnome” and “Fairy Way”)
- Small river rocks or pebbles (1 bag, for creating the path)
- Flowering plants (2-3 varieties, such as marigolds, petunias)
- Succulent plants (2-3)
- Decorative fence (1, 2×2 feet, white plastic or wood)
- Potting soil (1 bag)
Step-by-Step Guide
- Fill the wooden garden box with potting soil, ensuring it’s level across the bottom.
- Arrange the small decorative houses in the center, making sure they’re balanced with space for plants and pathways.
- Create a stone pathway using small river rocks or pebbles, arranging them in a winding shape that leads through the garden.
- Place the gnome figurines along the path and next to the houses to create a lively, magical look.
- Plant the flowering plants (like marigolds) and succulents in the garden box, around the houses and gnomes, to fill the space with vibrant colors.
- Position the decorative “Gnome Sweet Gnome” sign and fairy garden signs along the path to add personality and charm.
- Finally, install the white decorative fence around the edges of the garden to enclose the space and add a finishing touch.
#3. Fairy Mushroom House
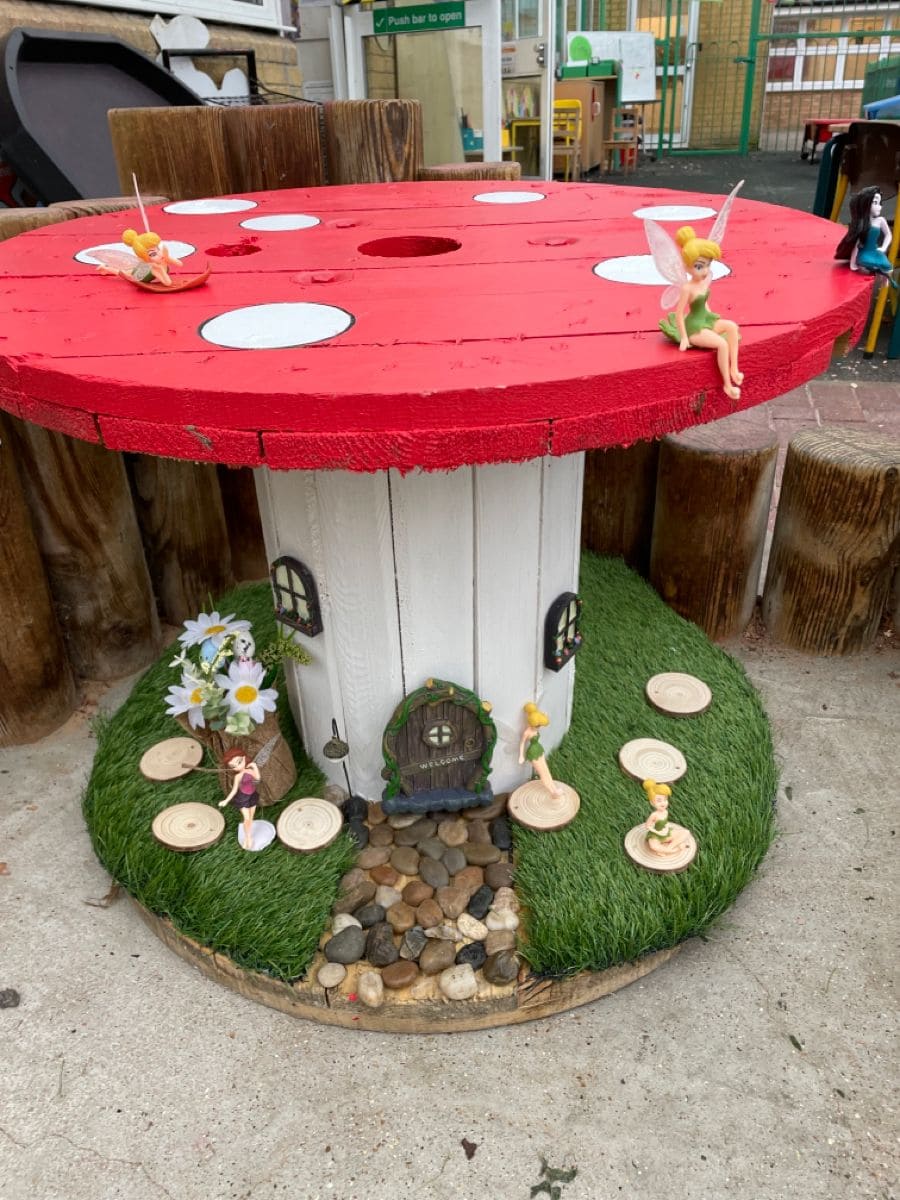
If you’re looking for a whimsical fairy garden centerpiece, this mushroom house made from a spool is a charming choice.
The large red mushroom top with white spots is a fun and playful interpretation of a fairy tale house, perfect for small garden spaces.
Around the base, you’ll find fairy figurines, a stone path, and artificial grass that create a cozy fairy retreat.
The bright red mushroom and the cute little “Welcome” door invite the fairies into their magical home, while the surrounding decorative elements, like flowers and logs, bring the scene to life with enchanting details.
Materials Needed
- Large wooden spool (1, 3-4 feet wide)
- Red paint (1 can for the mushroom top)
- White paint (1 small can for the mushroom spots)
- Grass turf (1-2 square feet for the base)
- Small smooth stones (about 2 cups for the path)
- Small round wood slices (5-6 for decoration)
- Miniature fairy figurines (3-4, 3-4 inches tall)
- Artificial flowers (a few small daisy flowers)
- Wooden door decoration (1, around 4 inches tall)
Step-by-Step Guide
- Take the large wooden spool and paint the top red to resemble a mushroom cap. Then add white spots to the top using white paint.
- Paint the lower part of the spool white to resemble the mushroom stem and add a wooden door and small details such as windows and flower designs.
- Apply artificial grass around the base of the spool to create a natural look for the garden.
- Arrange the small smooth stones in a circular path around the base to lead to the fairy door.
- Place miniature fairy figurines and tiny wooden circles to enhance the whimsical look of the fairy garden.
- Finish by adding artificial flowers near the door to add a splash of color and charm.
#4. Whimsical Fairy Garden Around a Tree
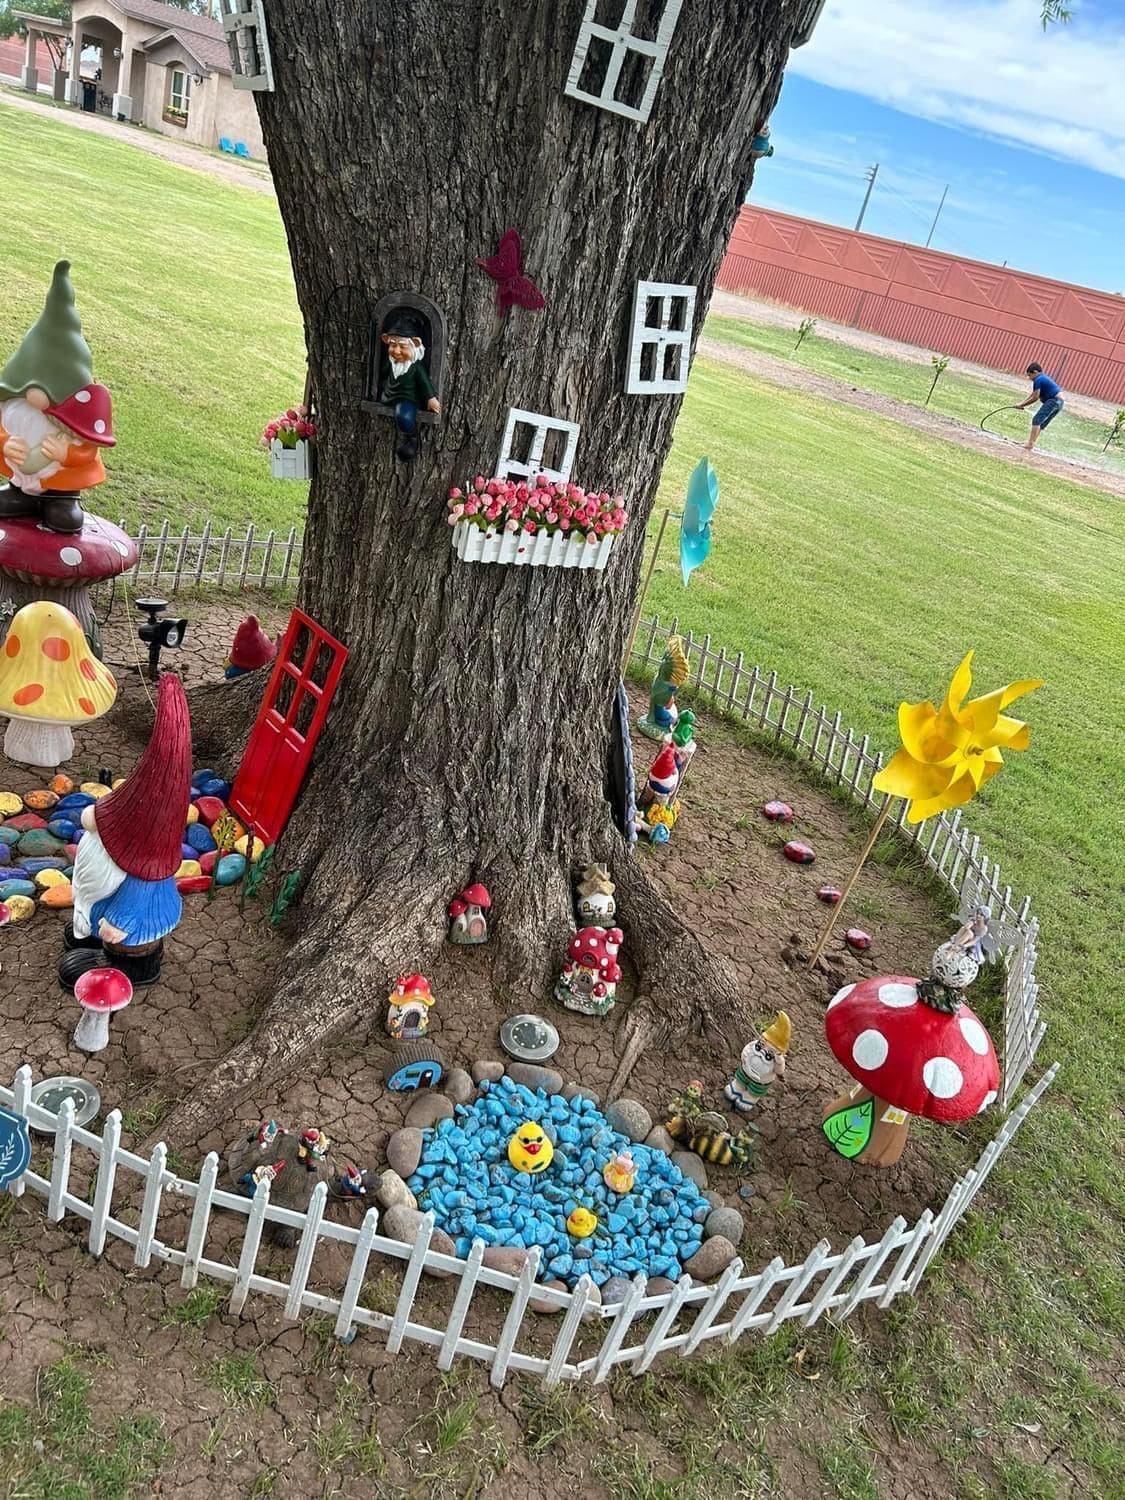
This idea captures a playful and vibrant setup with gnome figurines, miniature houses, and even tiny windows placed along the tree trunk.
The colorful mushrooms add a touch of magic, while the stone path, lined with white fencing, creates a charming border.
Moreover, a small pond made of blue stones and rubber ducks brings even more whimsy to the scene, making it a perfect spot for a fairy tale world.
Materials Needed
- Miniature windows (4-5 small, approximately 2-3 inches wide)
- Miniature doors (2, around 4 inches tall)
- Gnome figurines (5-6, 3-4 inches tall)
- Miniature mushrooms (3-4, various sizes)
- Small fencing (enough to surround the base, approximately 5 feet)
- Small colored stones (to create a pond, around 1-2 cups)
- Miniature flower boxes (2, approximately 3 inches wide)
- Miniature plants (3-4 small, 2-3 inches tall)
- Plastic or ceramic figurines (ducks, bees, etc.) (3-4 small figurines)
- Windmill or pinwheel (1, 6-8 inches tall)
Step-by-Step Guide
- Begin by selecting a tree or large stump that will serve as the base for your fairy garden.
- Attach miniature windows and doors along the tree trunk, positioning them as if fairies live inside.
- Create a pathway using small stones or pebbles, making sure to line it with tiny fences to define the garden area.
- Place gnome figurines, colorful mushrooms, and other small decorations along the path and around the tree trunk.
- Design the pond area by arranging the small blue stones into a circular shape, then place rubber duck figurines in the middle.
- Add plants or flowers in the miniature flower boxes and arrange them around the garden to fill empty spaces.
- Finally, place a windmill or pinwheel near the back of the garden for a fun finishing touch.
#5. Whimsical Fairy Garden in Planters
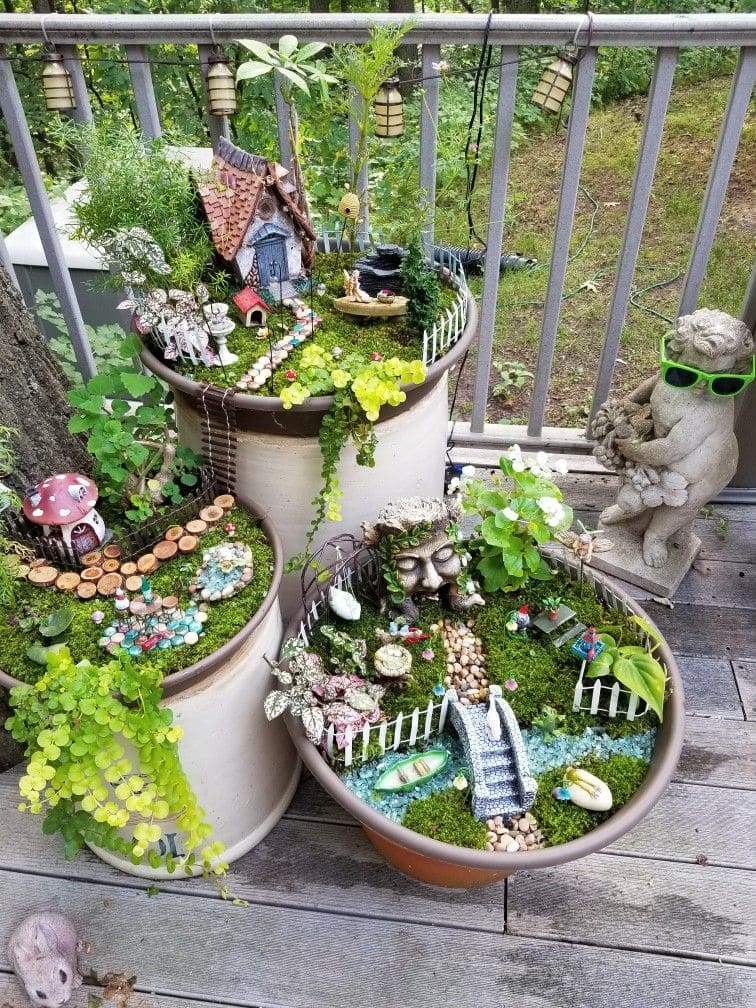
The charm of this fairy garden is brought to life in large planters, creating a miniature world that feels magical.
The carefully designed pathways, featuring small stepping stones and moss-covered areas, guide you through the space.
Also, a tiny house with a delightful door and roof, surrounded by colorful plants, adds to the whimsy.
The addition of miniature accessories like a boat, tiny statues, and a little bridge over a stream enhances the fantasy theme.
The garden is decorated with small fences and figurines, including a relaxed gnome, completing the playful scene.
Materials Needed
- 3 large planters (varied sizes)
- Moss (1-2 bags)
- Miniature fairy house (1)
- Miniature bridge (1)
- Small figurines (2-3 gnomes, animal figures)
- Pebbles or small stones (1 bag, for paths)
- Small garden fence (1 set)
- Small boat (1)
- Colored stones or glass pebbles (for stream, 1 bag)
- Fairy lights (1 set)
- Small plants (1-2 for greenery)
Step-by-Step Guide
- Begin by placing a layer of moss at the bottom of each planter to create a natural, soft base.
- Position the miniature house in one corner of the planter and surround it with moss, allowing it to sit firmly.
- Lay the small stones or pebbles along the path to form a winding road leading up to the house, making sure to leave enough room for the plants.
- Add the small plants around the house and path to fill the space with color and texture.
- Place the miniature bridge over the moss-covered area or a patch where you want to create a tiny stream. Use colored glass or pebbles to form a water effect.
- Arrange the gnome figurines, animal figurines, and other accessories around the garden to bring the fairy garden to life.
- Install fairy lights around the edge of the planters, ensuring they wrap around the garden to add a magical glow during the evening.
#6. Fairy Garden at Twilight
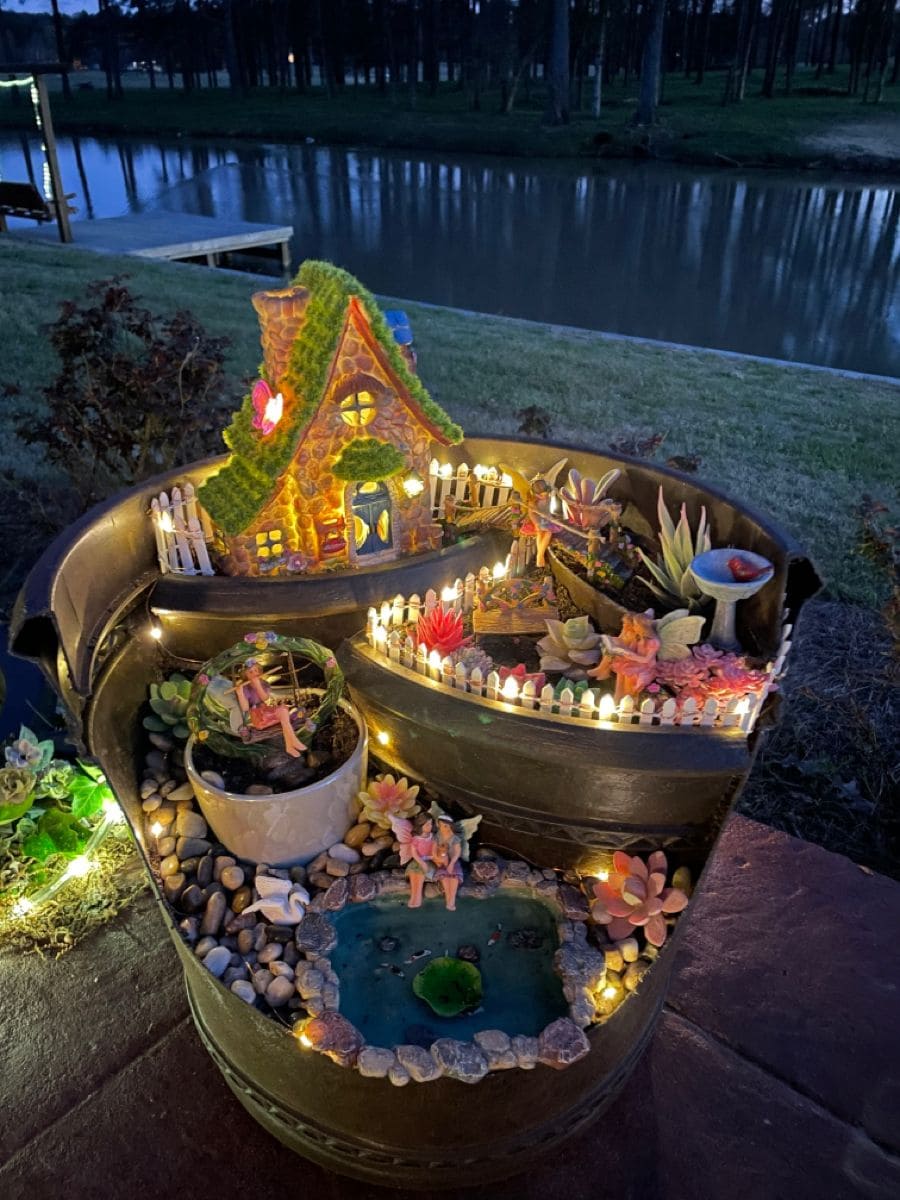
At the edge of a serene pond, this enchanting fairy garden sparkles in the evening light.
The illuminated house, crafted with colorful details, is surrounded by a small white fence and twinkling lights.
A second level with a tiny pond features a delicate fairy on a swing, giving the space a peaceful, whimsical charm.
Lush succulents and carefully arranged pebbles bring a natural, earthy touch to the scene, while the gentle glow of the fairy lights adds a magical, inviting atmosphere.
Materials Needed
- 1 medium-sized round planter or similar container
- 1 miniature fairy house with light
- 1 small white picket fence (or craft sticks to create your own)
- Small string of LED fairy lights
- Assorted succulents (4-6 small plants)
- 1 small fairy figurine for the swing
- 1 tiny artificial pond (or DIY pond using stones and blue paint)
- Small pebbles (1 bag)
- Potting soil (1 small bag)
Step-by-Step Guide
- Begin by filling your planter with potting soil, making sure it’s even and stable.
- Position the miniature fairy house at the top of the container and secure it gently in place.
- Lay the string of LED fairy lights around the base of the house and throughout the garden, creating a whimsical glow.
- Arrange the succulents and plants around the house, using the small fairy as a focal point by placing it near the pond.
- Create a mini pond by arranging pebbles in a circular shape, then adding a small blue-painted surface to resemble water.
- Complete the look by placing the white picket fence around the edges of the garden and adding small decorative touches like tiny fairy statues or other items of your choice.
#7. Fairy Garden with Miniature Fairy House and Pond
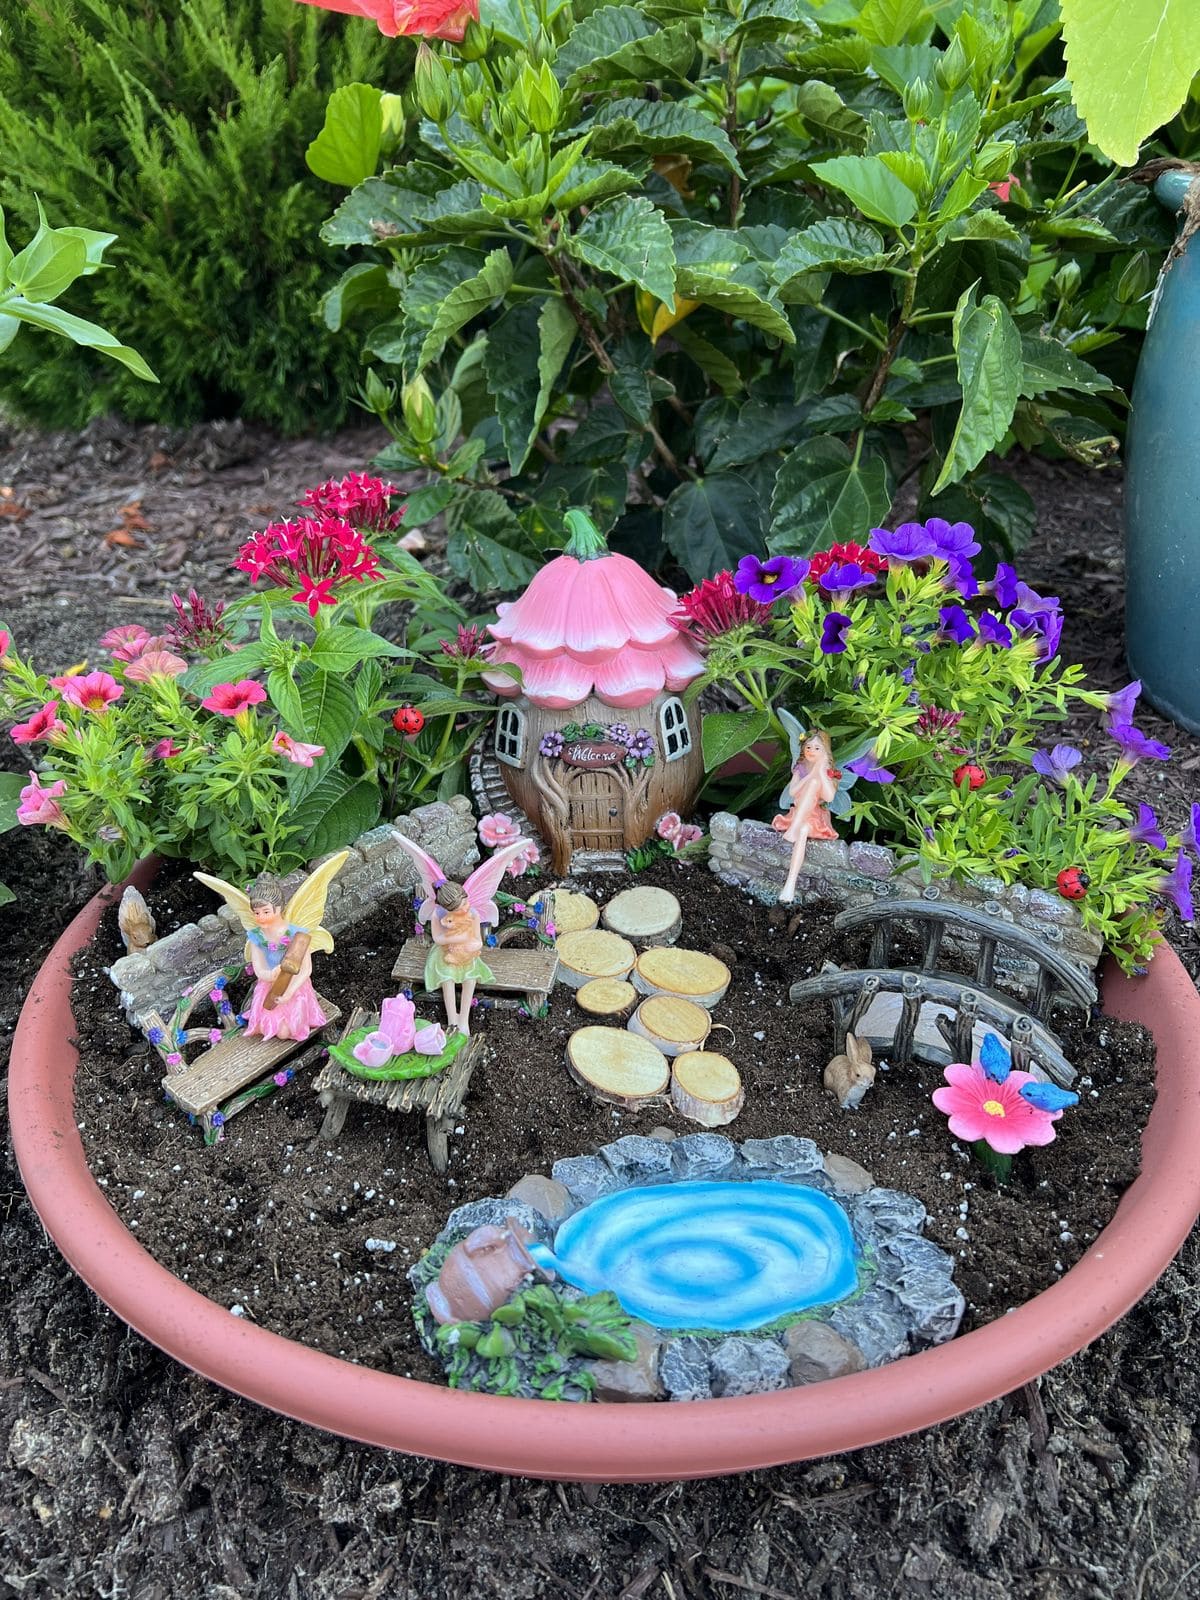
This fairy garden features a cozy little scene with a charming fairy house nestled among colorful flowers and plants.
The miniature fairy figurines, placed around the garden, add a playful and magical touch.
The pond adds a serene, tranquil element, and the small wooden benches and stone bridge provide a sense of adventure and whimsy.
The overall style evokes a sense of natural beauty, mixed with a touch of fantasy, perfect for creating a tiny, enchanting world in your outdoor space or even as an indoor decoration.
Materials Needed
- Miniature fairy house (1, approximately 3-4 inches tall)
- Fairy figurines (2-3, approximately 2-3 inches tall)
- Small wooden pieces (for benches and tables, 3-4 pieces, approximately 1-2 inches in diameter)
- Miniature stone bridge (1, approximately 3 inches wide)
- Artificial plants or small flowers (variety, to line the garden)
- Miniature pond (1, pre-made or made from clay, approximately 2 inches in diameter)
- Round flower pot or shallow container (1, approximately 10 inches in diameter)
- Potting soil
- Colored pebbles (for pathways)
- Miniature accessories (optional, such as a watering can, small animals, etc.)
Step-by-Step Guide
- Start by filling your shallow flower pot or container with potting soil as the base. This will create a sturdy foundation for the garden elements.
- Place the miniature fairy house at the back or side of the container, ensuring it’s the focal point of the display.
- Use small wooden pieces or colored pebbles to create a charming pathway leading up to the fairy house, enhancing the whimsical atmosphere.
- Position the fairy figurines around the garden, placing them on the benches, near the pond, and among the plants to add life to the scene.
- Add the miniature pond by either positioning a pre-made one or crafting your own using clay. Then place it near the front or side for a serene touch.
- Decorate with artificial plants or small flowers to create natural-looking borders and add visual interest around the fairy house and pond.
- Finish the garden by adding a miniature bridge over the pond and other small accessories, such as tiny animals or a watering can, to complete the fairy tale vibe.
#8. Fairy Garden in a Pot
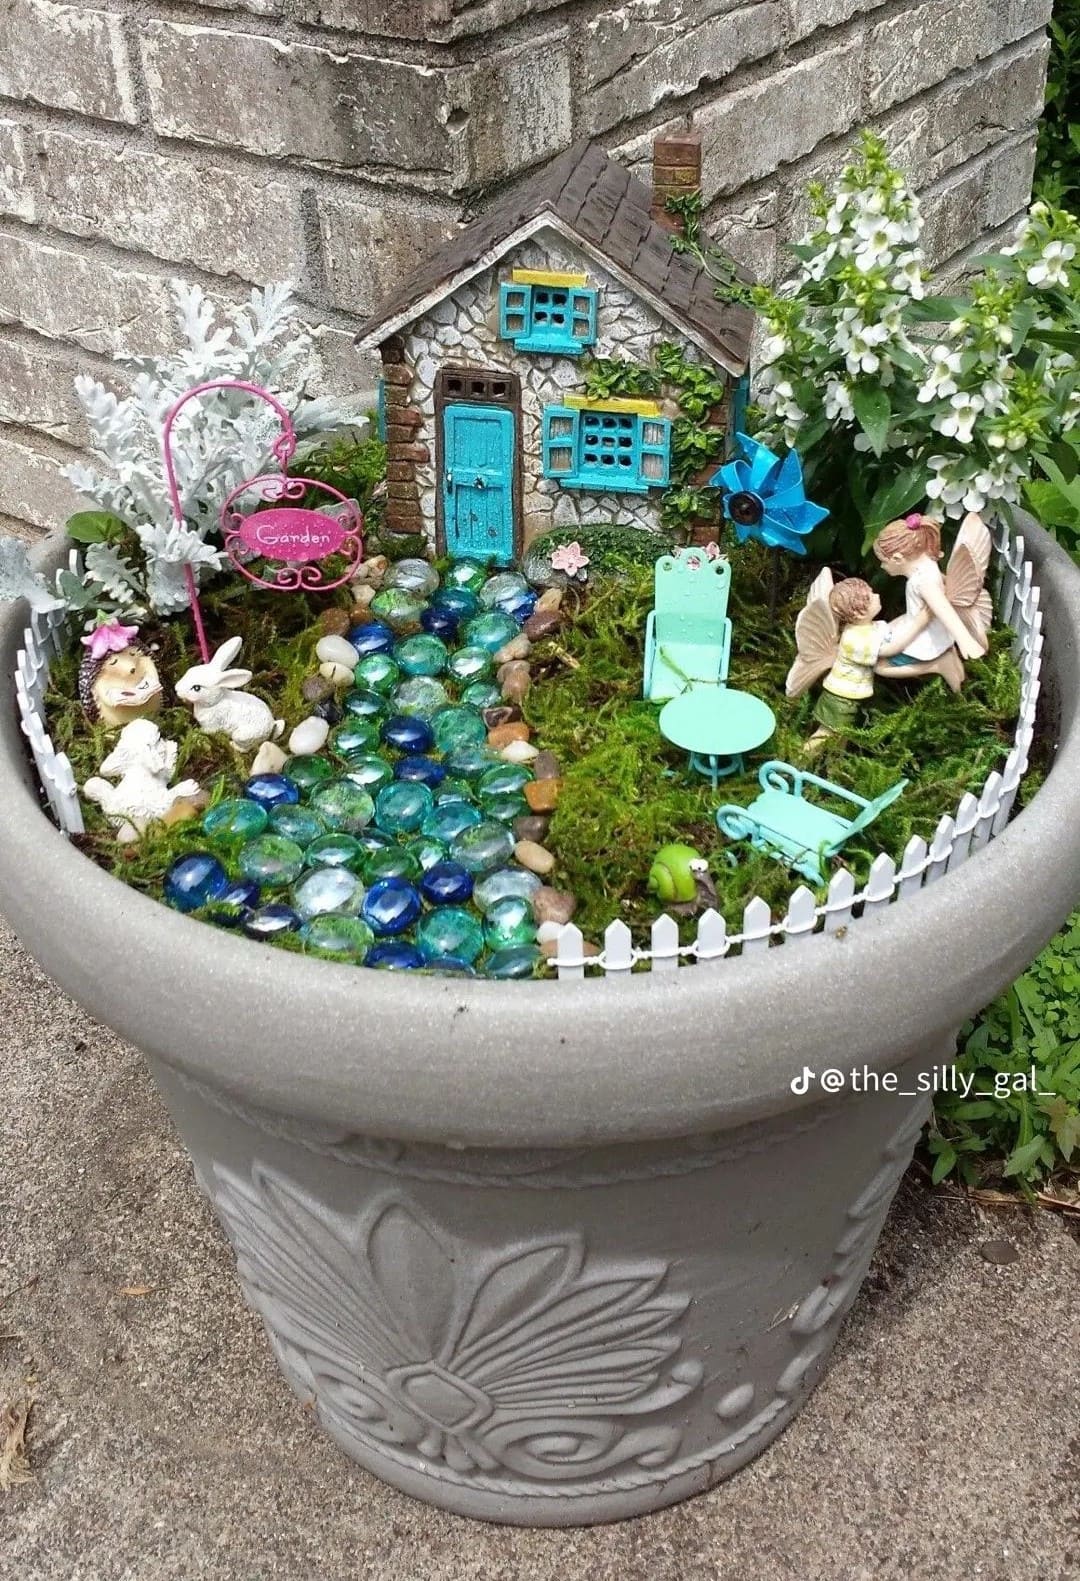
The combination of a cozy cottage and whimsical details make this fairy garden in a pot truly enchanting.
The bright turquoise door and windows on the stone house stand out beautifully against the green plants and mossy ground.
A small stone pathway, made from blue and clear glass gems, leads to a tiny garden sign, while adorable fairy figurines dance around a miniature seating area.
The white picket fence perfectly frames the scene, giving it a neat and inviting appearance.
Materials Needed
- 1 medium-sized flower pot
- 1 fairy figurine (2-3 pieces)
- 1 miniature stone house
- Small glass gems (blue, green, and clear)
- Small pebbles (for the pathway)
- Artificial moss (1 bag)
- Miniature garden sign
- 1 small picket fence
- Miniature garden furniture (chairs and table)
- Artificial flowers (2-3 small plants)
Step-by-Step Guide
- Fill the flower pot with potting soil up to the halfway point.
- Place the miniature stone house in the center, making sure it stands securely.
- Create a winding pathway with the small glass gems, arranging them in a natural-looking curve.
- Cover the soil with artificial moss to give it a lush, green appearance.
- Add the miniature picket fence around the edge of the pot for a neat, enclosed garden.
- Position the fairy figurines and small garden furniture around the house, allowing for a harmonious flow of the scene.
- Plant the artificial flowers in clusters around the pot for extra color and texture.
#9. Whimsical Fairy Garden in a Planter
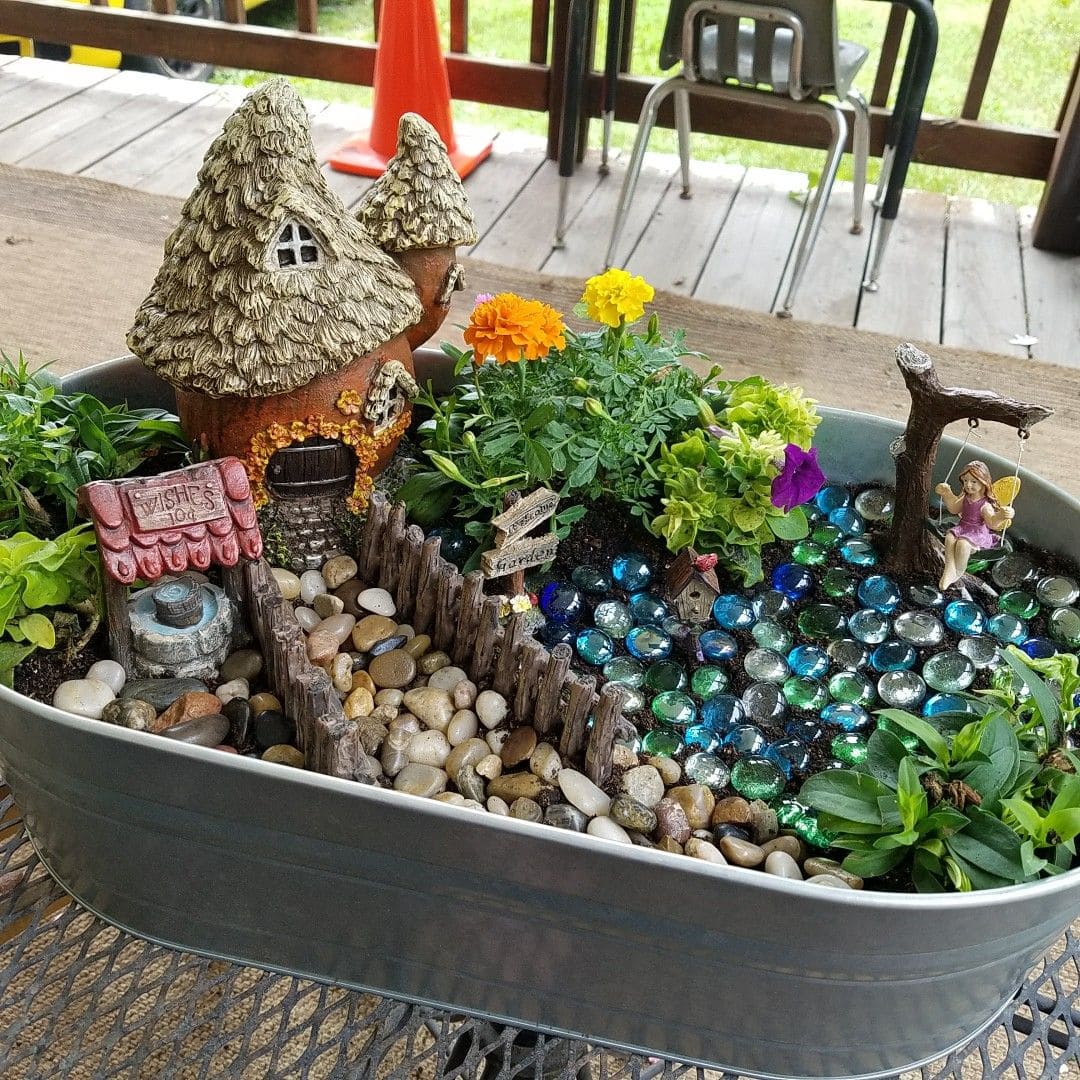
For a magical fairy garden that fits into a compact space, this planter idea is perfect.
A small, rustic fairy house with thatched roofing stands as the centerpiece, surrounded by vibrant flowers like marigolds and petunias.
Pebbles create charming walkways, while a tiny fence defines the garden’s perimeter.
The addition of glass pebbles mimics a sparkling pond, where a fairy sits on a swing, adding an extra touch of whimsy.
Materials Needed
- 1 shallow metal planter
- 1 small fairy house (thatched roof)
- 1 small wishing well figurine
- 1 miniature garden swing with a fairy figurine
- Marigold and petunia plants (2-3 plants each)
- Small pebbles (1 bag, for pathways and around the garden)
- Glass pebbles (1 bag, to simulate water)
- Small fence (miniature)
- Potting soil (1 bag)
Step-by-Step Guide
- Begin by filling the bottom of the planter with potting soil, ensuring it’s evenly spread.
- Position the fairy house at the center of the planter, securing it gently into the soil.
- Place the wishing well next to the house and arrange the other small figurines like the garden swing around the house for a balanced look.
- Create a path using small pebbles that leads from the house to the edge of the planter.
- Scatter the glass pebbles in a designated area to mimic a magical pond effect.
- Arrange the flowers around the fairy house and along the paths to add color and life to the garden.
- Finish by adding a small wooden or plastic fence along the perimeter for a charming border.
#10. Whimsical Fairy Garden in a Barrel
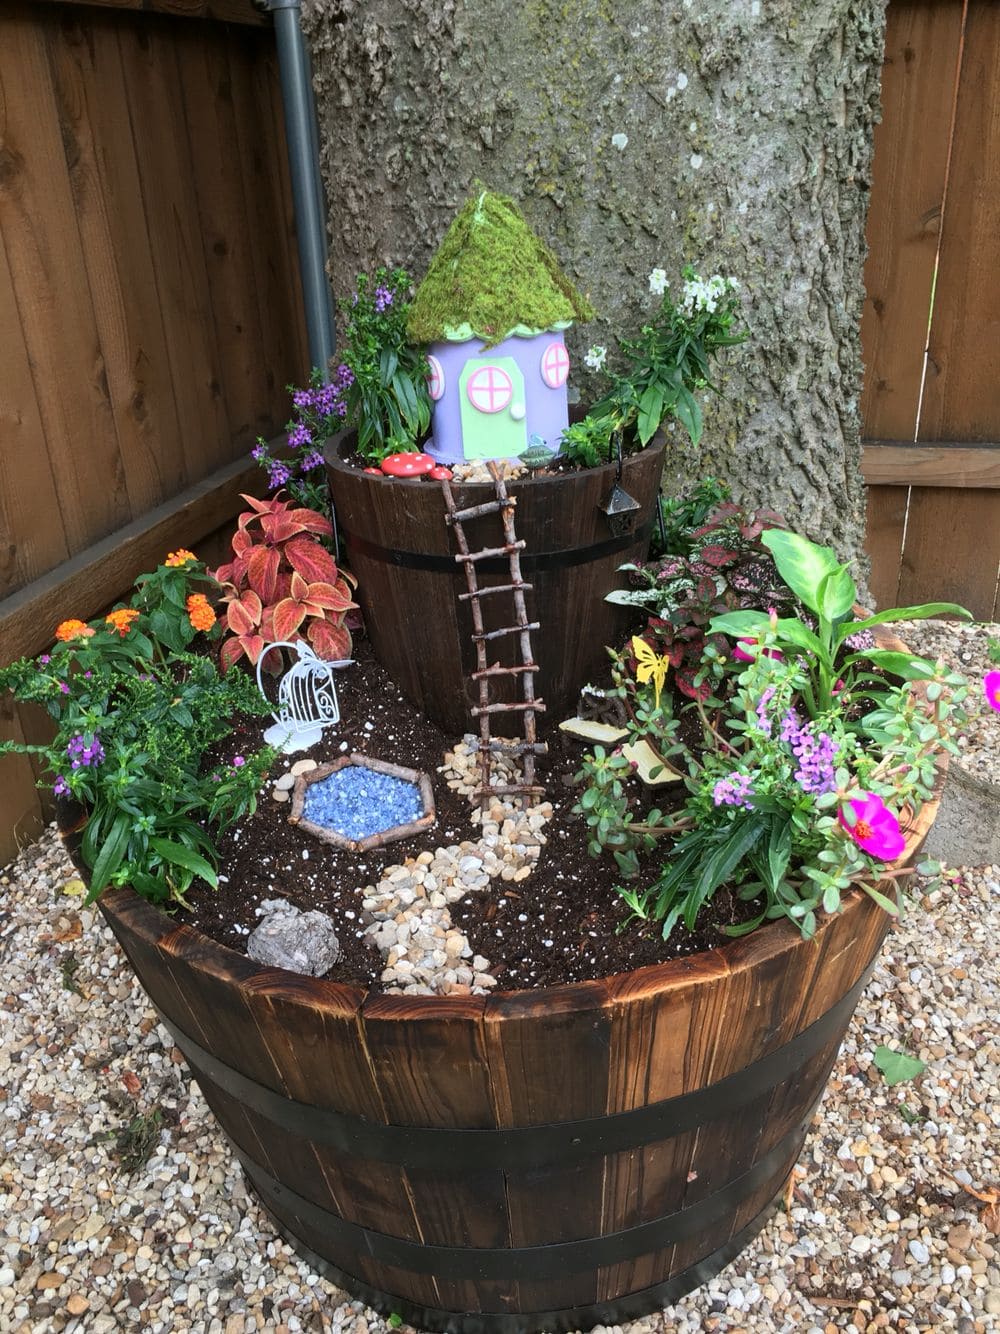
How about about creating a charming fairy garden inside a rustic wooden barrel?
This image showcases a delightful miniature world, with a purple fairy house topped with moss, colorful flowers, and a charming stone pathway.
The whimsical ladder leading to the house adds a touch of fantasy, while the small rock garden and vibrant plants create an inviting, peaceful atmosphere.
The fairy garden is surrounded by a simple wooden fence, enhancing the magical vibe.
Materials Needed
- 1 wooden barrel planter
- 1 miniature fairy house (purple with moss roof)
- Small wooden ladder
- Miniature rocks (for pathway)
- Small gravel (blue for decoration)
- 1 miniature garden chair
- 1 miniature birdbath
- 2-3 small flower plants (various colors)
- Artificial moss (for house roof)
- Soil
Step-by-Step Guide
- Fill the wooden barrel with soil up to about two-thirds of the way.
- Place the miniature fairy house in the center, making sure it’s stable.
- Create a small stone pathway leading up to the house, using miniature rocks.
- Scatter the small blue gravel around the path for added decoration and texture.
- Arrange the plants around the house, focusing on adding vibrant colors and variety.
- Position the wooden ladder against the house for that whimsical touch.
- Add the birdbath and miniature chair in the garden, placing them thoughtfully for balance and visual appeal.
#11. Miniature Fairy Garden with Mushroom House and Path
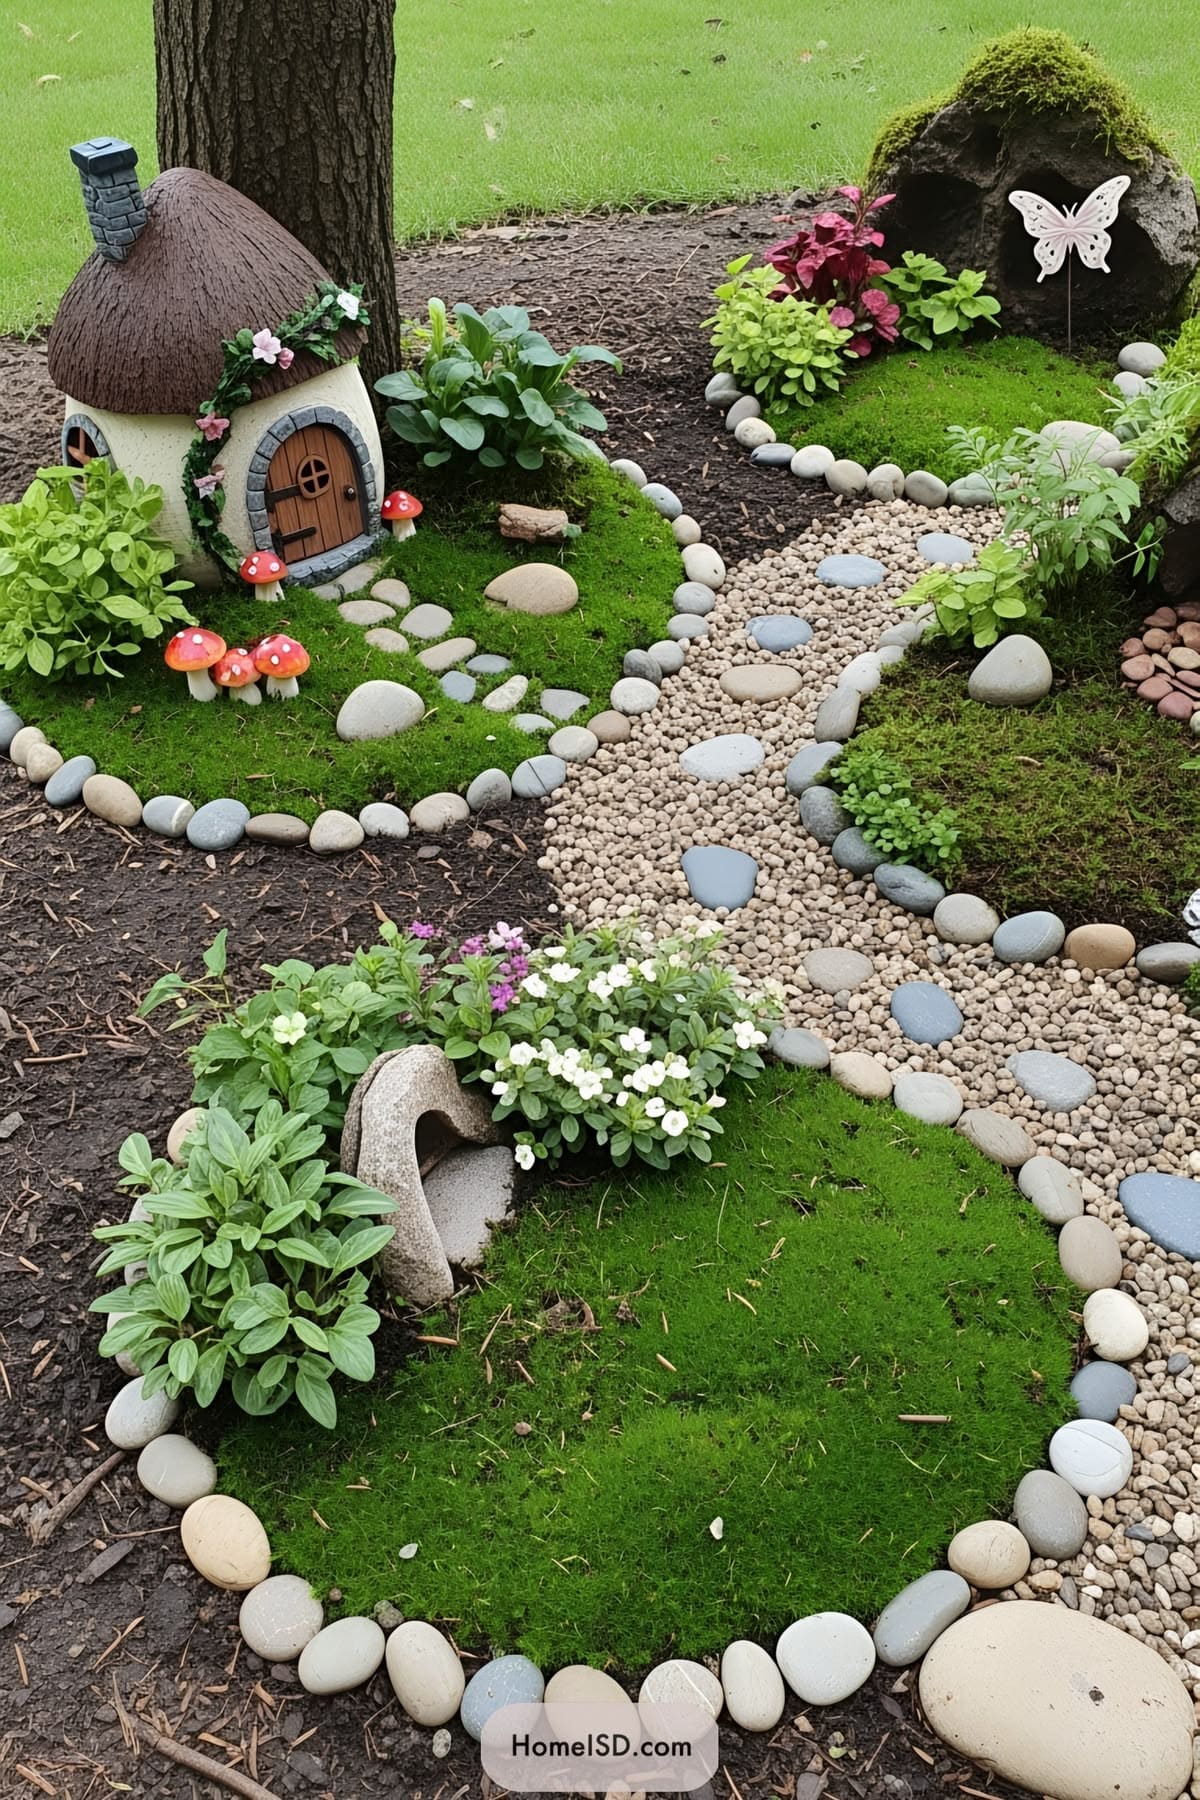
What about creating a delightful fairy garden with a whimsical mushroom house?
This charming setup is designed with small stone paths that guide you through a tiny green world.
The soft moss beds surrounding the fairy house add a natural touch, while the colorful flowers and plants bring life to the tiny landscape.
Plus, a butterfly decoration enhances the magical theme, and the stone-lined garden provides a rustic feel.
Materials Needed
- Miniature mushroom house (1, approximately 3-4 inches tall)
- Fairy figurines (2-3, approximately 2-3 inches tall)
- Small round stones (for the paths, about 2-3 cups worth)
- Gravel (to line pathways, about 1 cup)
- Moss or moss-like material (enough to cover the base area)
- Miniature plants or flowers (3-4 small plants, varying colors)
- Miniature butterfly decoration (1, approximately 2 inches)
- Small garden tools (optional, for added decoration)
- Shallow container or flowerpot (1, approximately 10 inches in diameter)
- Potting soil
Step-by-Step Guide
- Fill your shallow container or flowerpot with potting soil, creating a flat base for your garden.
- Place the miniature mushroom house in the center or slightly off-center of the garden, making it the focal point of the space.
- Lay small stones along a path leading up to the mushroom house. You can use the stones to create a winding pathway, filling in any gaps with gravel.
- Surround the mushroom house with moss to mimic grass or a soft ground cover.
- Add miniature plants or small flowers around the fairy house to provide color and dimension to the garden.
- Place the butterfly decoration on the edge of the garden or along the path to enhance the whimsical feel.
- Finish by positioning your fairy figurines around the garden, adding them to benches, or letting them wander near the flowers to bring the scene to life.
#12. Fairy Garden in a Flower Pot
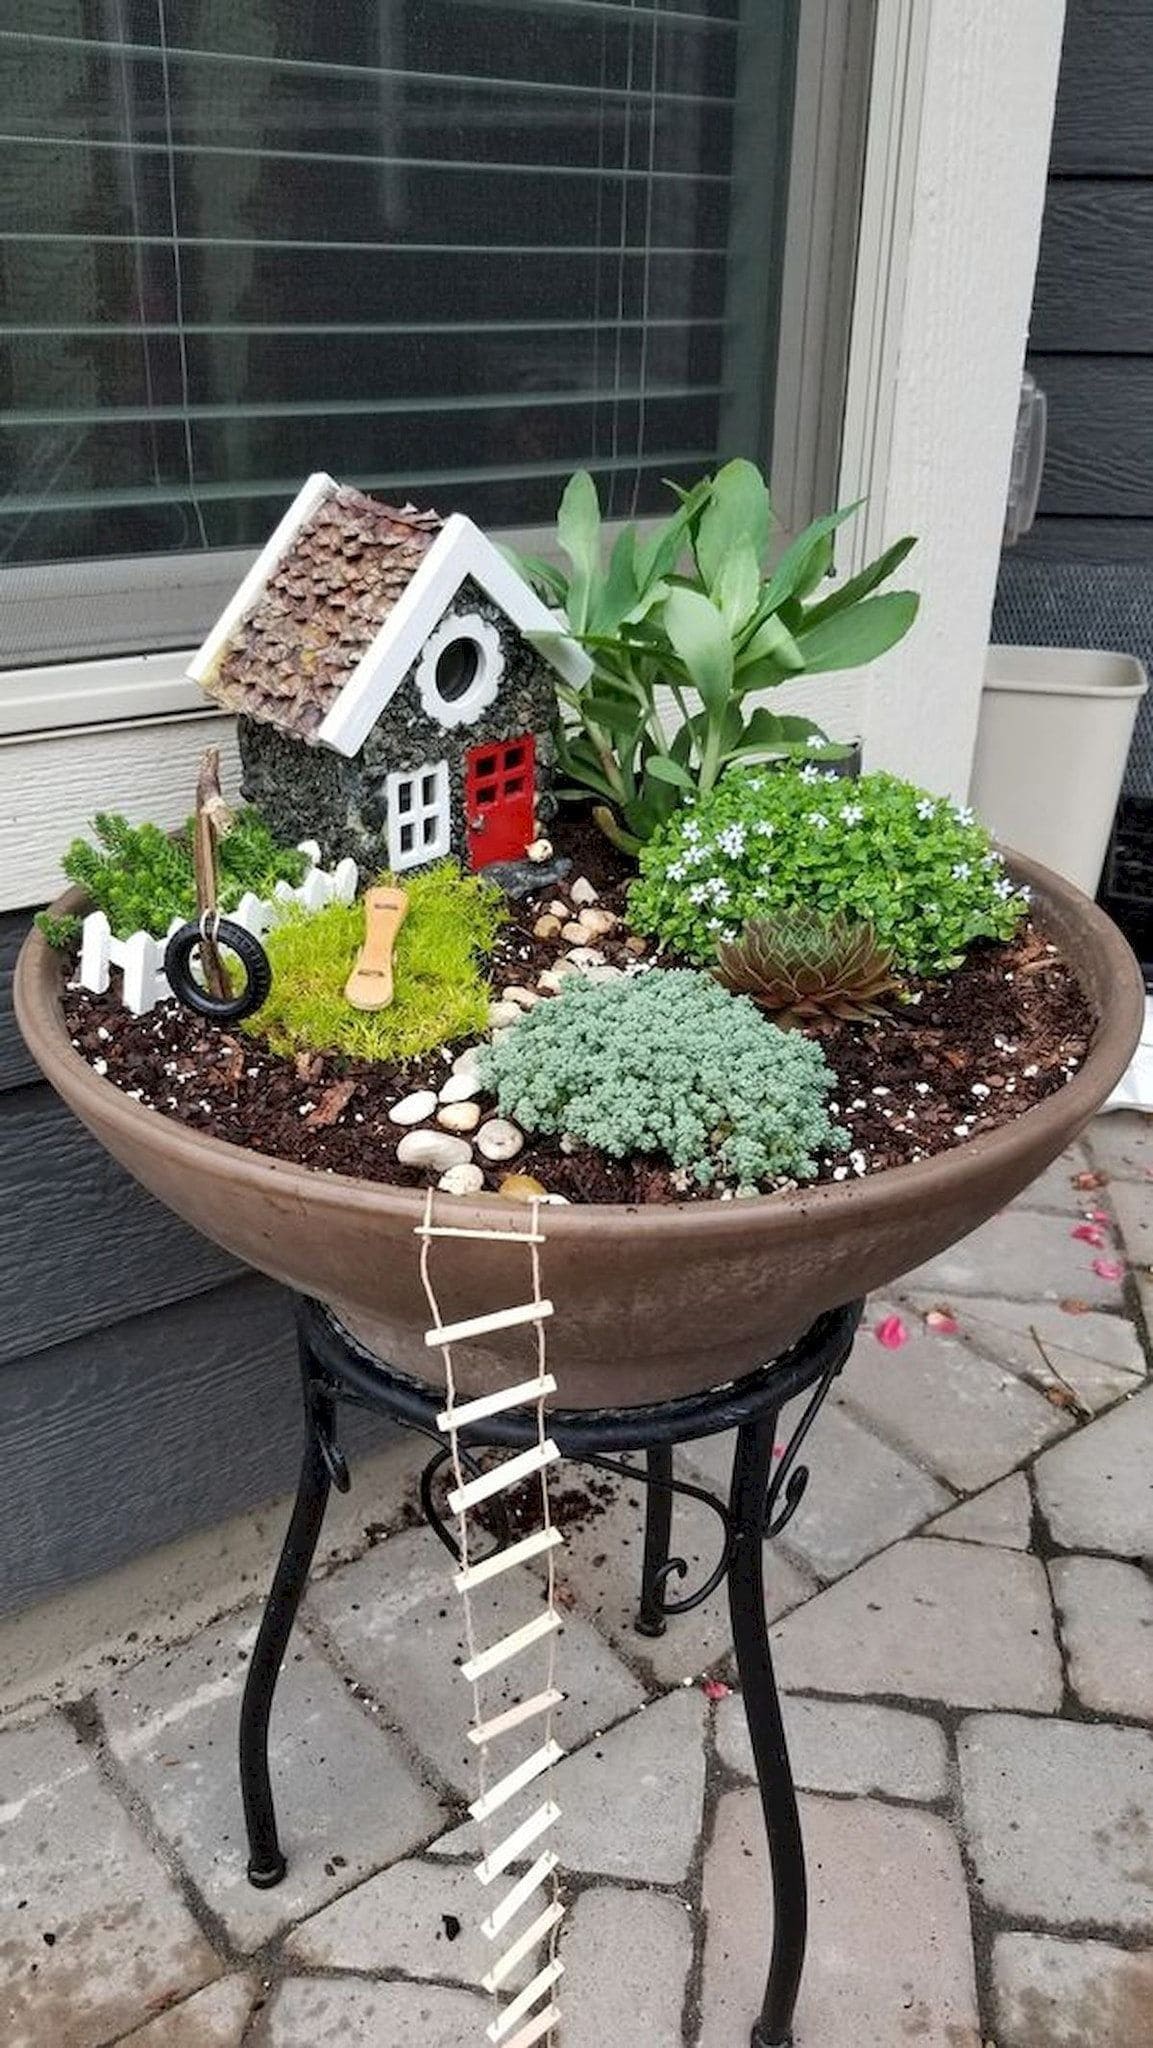
Even the smallest spaces can be transformed into a fairy garden, like this charming little one in a flower pot.
The tiny house with a stone roof stands at the center, surrounded by lush green plants and a well-kept lawn.
A miniature tire swing adds whimsy to the scene, complemented by a cute little wooden ladder leading to the tiny home.
This fairy garden offers a peaceful retreat, enhanced by small details like the white fence and colorful flowers.
Materials Needed
- 1 medium-sized flower pot
- 1 miniature fairy house with a stone roof
- Small pebbles for pathways (1 small bag)
- 1 miniature wooden ladder
- 1 tiny tire swing
- Assorted miniature plants (succulents, moss, etc.)
- Decorative items (such as tiny garden tools, fairy figurines)
- Potting soil (1 small bag)
- White mini picket fence (or craft sticks to create one)
Step-by-Step Guide
- Fill the flower pot with potting soil, ensuring it’s evenly spread.
- Position the miniature fairy house at the center of the pot and secure it gently into the soil.
- Create a pathway around the house using small pebbles, arranging them to form a charming route.
- Place the tire swing near the house, ensuring it sits securely in the soil.
- Add the wooden ladder leading to the fairy house, placing it at the front for easy access.
- Arrange miniature plants around the house, such as moss and succulents, to give a lush and garden-like appearance.
- Finish by adding the small picket fence around the garden, enhancing the magical, protected feel.
Conclusion
No matter how big or small your garden may be, fairy gardens offer endless opportunities for creativity and charm.
By incorporating these 12 enchanting ideas, you can easily add whimsy and personality to your outdoor space.
Whether it’s a lush flower-filled fairy haven or a tiny stone cottage nestled between succulents, the possibilities are as magical as the fairies themselves.
So, gather your materials, let your imagination soar, and watch as your garden transforms into a mystical paradise where magic comes to life!