Sweet potatoes are a beloved staple in kitchens around the world.
Known for their sweet flavor, vibrant color, and numerous health benefits, they make an excellent addition to any garden.
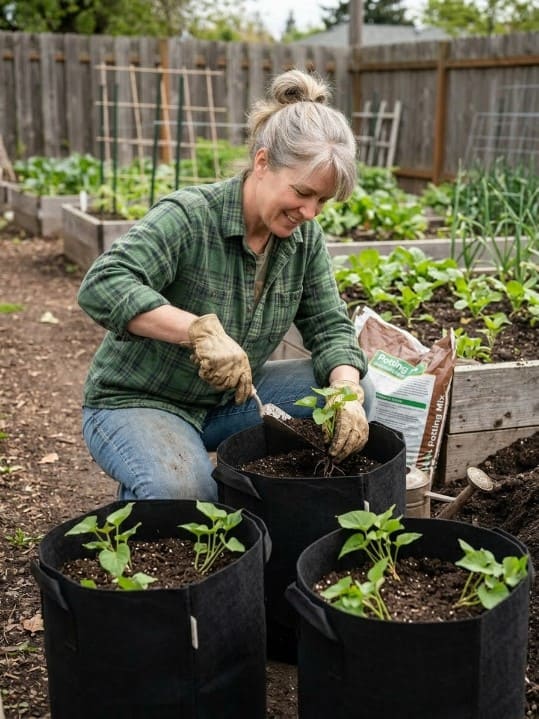
But did you know that you don’t need a traditional garden bed to grow them? You can easily grow sweet potatoes in a bag!
This method is perfect for those with limited garden space, urban gardeners, or anyone looking for an easier, low-maintenance way to cultivate these delicious tubers.
In this guide, I will walk you through the entire process of growing sweet potatoes in a bag, starting from choosing the right materials to harvesting your crop. Let’s get started!
What You Need to Grow Sweet Potatoes in a Bag
Before you begin, it’s essential to gather the right materials.
Fortunately, growing sweet potatoes in a bag doesn’t require too many items, and most of what you need can be found easily at garden stores or online.
Materials Required
1. Planting Bag
The most crucial item you’ll need is the planting bag. Ideally, choose a bag that is at least 20-30 gallons in size.
Fabric bags are the best option because they allow for proper air circulation and drainage.
Look for bags designed for growing vegetables, as these typically come with built-in drainage holes to prevent root rot.
However, you can also use plastic bags, as long as you poke holes in the bottom for drainage.
2. Sweet Potato Slips
Sweet potato slips are small plants that grow from a whole sweet potato. You can purchase these from garden centers or grow your own by sprouting a sweet potato.
A slip is essentially a sprout that grows from the potato’s eyes. Once you have the slips, you can plant them directly into the bag.
3. Good-Quality Soil
Sweet potatoes require loose, well-drained soil that is rich in organic matter.
A mix of compost and garden soil works well, but you can also add a little sand to improve drainage. Sweet potatoes don’t like waterlogged soil, so ensuring good drainage is essential.
4. Fertilizer (Optional)
Sweet potatoes are relatively low-maintenance, but they do benefit from a bit of fertilizer.
A balanced, organic fertilizer can provide the nutrients they need to grow strong, healthy roots. If your soil is nutrient-rich, you may not need to fertilize at all.
5. Watering Can or Hose
Sweet potatoes need consistent moisture, but it’s important not to overwater.
A watering can or hose with a gentle spray attachment will help you keep the soil moist without flooding the bag.
6. Location
Choose a sunny spot for your bag, as sweet potatoes require at least 6-8 hours of sunlight a day to grow properly.
A spot on your patio, balcony, or even your driveway will work well, as long as it gets plenty of sun.
Tools You Might Need
- Garden gloves
- Trowel or small shovel
- Scissors or pruning shears
Preparing the Growing Bag
Choosing the Right Bag
As mentioned earlier, the bag should be large enough to give your sweet potatoes room to grow. A 20-30-gallon bag is ideal, as it provides enough space for the roots to spread out.
Look for bags made from breathable fabric, as this helps with air circulation around the roots, promoting healthy growth.
You can find plant bags made specifically for growing vegetables, which often have good drainage features.
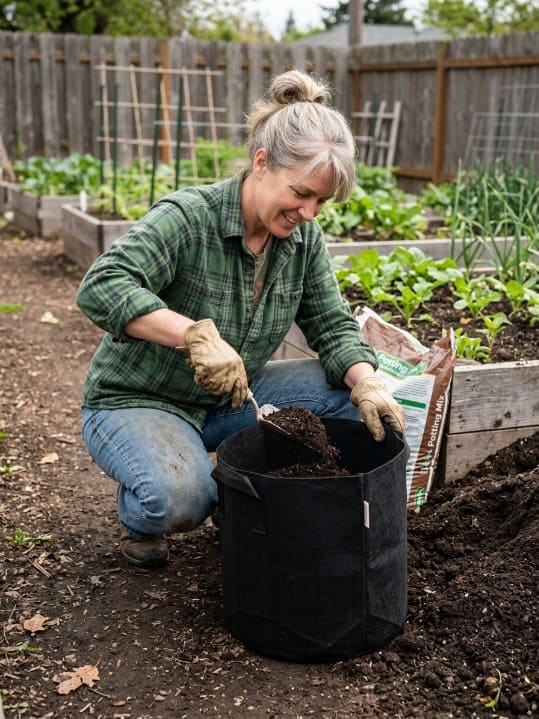
How to Set Up the Bag
Once you have your bag, it’s time to prepare it for planting. You begin by adding a layer of soil at the bottom of the bag. About 4 inches of soil should suffice for the base layer.
Next, mix in some compost to enrich the soil. Sweet potatoes thrive in nutrient-rich soil, so compost is essential. Mix it well with the existing soil.
If your bag doesn’t already have drainage holes, you’ll need to poke a few in the bottom. This will prevent the soil from becoming waterlogged, which can cause the roots to rot.
Now find a location that receives at least 6-8 hours of sunlight per day. A sunny patio or balcony is perfect for this.
Make sure the area is also sheltered from strong winds, as the vines can be quite delicate.
Planting Sweet Potato Slips
You can grow sweet potato slips by sprouting a whole sweet potato. Select a firm, unblemished sweet potato. Look for one that’s free of any soft spots or bruises.
Next, place the sweet potato in a glass of water, ensuring that the bottom is submerged.
You can use toothpicks to suspend it over the water. Make sure the sweet potato is in a warm place, as warmth encourages sprouting.
In 2-3 weeks, you should see small sprouts, or “slips,” emerging from the sweet potato. Once they are about 6 inches long, they’re ready to be harvested.
Gently pull the slips off the sweet potato and place them in water for a few days to allow the roots to develop further. After the roots have grown, they’re ready to be planted.
Alternatively, you can skip the sprouting process and purchase sweet potato slips from a local nursery or garden center.
Planting Instructions
Once you have your slips ready, follow these steps to plant them in your growing bag:
- Make small holes: Use a trowel or your hands to make small holes in the soil, about 6-8 inches deep.
- Insert the slips: Place one slip into each hole, making sure the roots are buried under the soil. Space the slips 12-18 inches apart to allow room for them to grow.
- Water immediately: After planting, water the slips thoroughly. This helps them settle into the soil and start rooting.
- Add soil if necessary: If the soil settles too much after watering, add more soil to cover the slips.
Caring for Your Sweet Potatoes
Watering and Moisture Needs

Sweet potatoes need consistent moisture, but they don’t like being too wet. Aim to keep the soil moist, but not soggy.
Water the bag deeply once or twice a week, depending on the weather. If it’s particularly hot or dry, you may need to water more frequently.
Make sure the soil is well-draining to prevent water from collecting at the bottom of the bag.
You need to check the moisture level by sticking your finger into the soil if it feels dry an inch below the surface, it’s time to water.
Fertilizing
Although sweet potatoes are relatively low-maintenance, adding a bit of fertilizer can help boost their growth.
Apply an organic or balanced fertilizer every 4-6 weeks during the growing season. If your soil is already rich in nutrients, you may not need to fertilize at all.
Sunlight Requirements
Sweet potatoes thrive in full sunlight. Ensure the bag is placed in an area that gets at least 6-8 hours of direct sunlight each day.
If your bag is in a shaded spot, the growth may be slower, and you may not get a large harvest.
Pruning and Managing Vines
As your sweet potatoes grow, they will produce long vines that spread out.
Pruning isn’t necessary, but if you want to manage their growth or prevent the vines from overtaking your space, you can trim them back.
Removing dead or yellowing leaves will also help direct energy to the tubers.
Harvesting Sweet Potatoes
Harvesting sweet potatoes is one of the most exciting parts of the growing process, as it signifies the culmination of your hard work.
However, timing is crucial, as harvesting too early or too late can affect the size, taste, and quality of your sweet potatoes.
Signs of a Healthy Crop
As your sweet potatoes mature, the vines will start to yellow and die back. This is a natural part of the plant’s life cycle and a key indicator that it’s time to harvest.
Pay attention to these signs:
- Vines and Leaves Yellowing: When the vines begin to yellow and wither, the plant is nearing the end of its growth cycle. The leaves may also start to drop off, signaling that the sweet potatoes have fully matured underground.
- Foliage Wilting: The sweet potato vines will start to lose their vigor, and the leaves will begin to curl up or become limp. This is a sure sign that the plant is no longer actively growing, and the tubers have reached their maximum size.
While it’s tempting to dig up your sweet potatoes as soon as the vines start to wither, it’s important to wait until the leaves have fully yellowed to ensure that the tubers are fully formed.
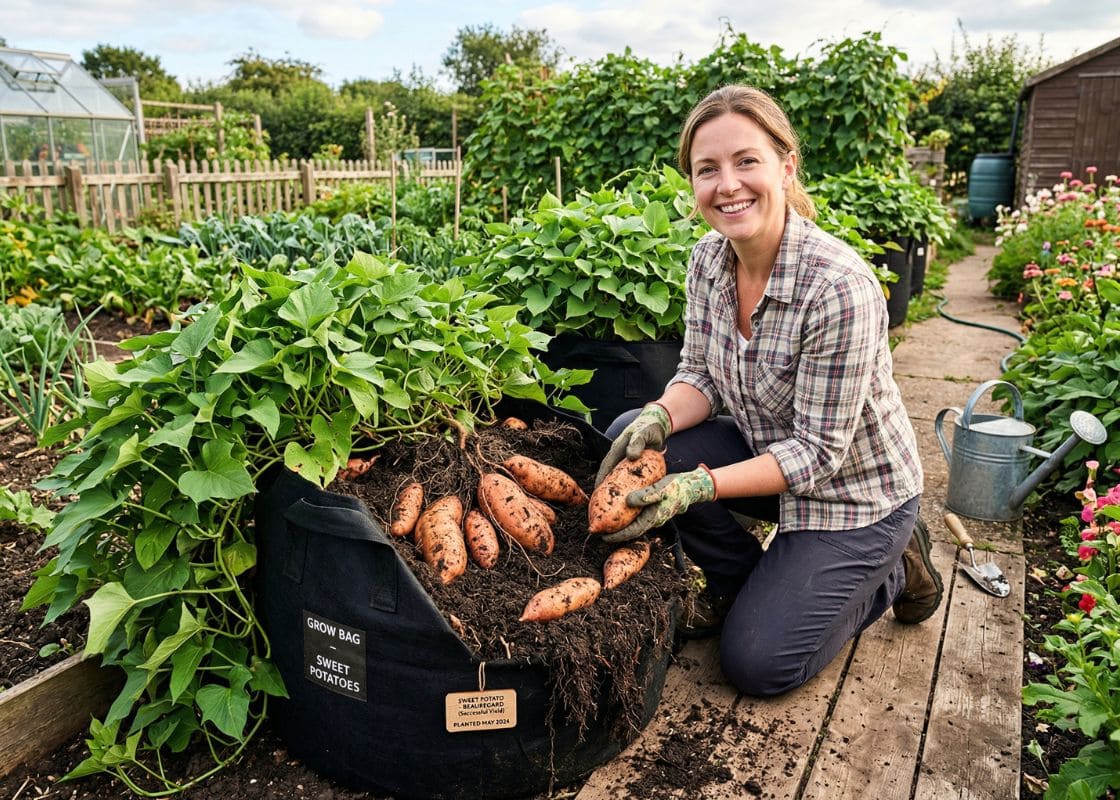
How to Harvest Sweet Potatoes from the Bag
When it’s time to harvest, you want to be as gentle as possible to avoid damaging the tubers. Follow these steps for a successful harvest:
1. Gently Move the Vines Aside:
Start by gently pushing the sweet potato vines away from the bag. If you have pruned or trimmed any of the vines, ensure that the remaining vines are accessible.
Be mindful not to break or damage the roots while handling the vines.
2. Digging the Sweet Potatoes:
Using a small shovel, trowel, or even your hands, carefully dig around the base of the plant.
If you’re using a fabric or breathable growing bag, you may be able to simply tip it over gently and let the soil fall out, which can make harvesting easier.
If you’re using a plastic bag, it may be necessary to carefully pull the bag off the root system.
Be cautious while digging; sweet potatoes have delicate skins, and they can be easily bruised or damaged, especially if they are pulled too aggressively.
Work slowly and carefully to ensure that the tubers are intact.
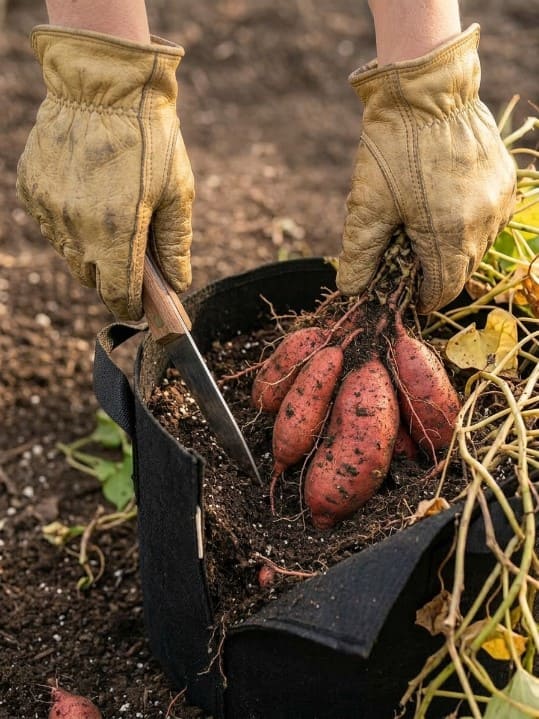
3. Pulling the Tubers:
After loosening the soil, gently pull the sweet potatoes out. You might need to wiggle them free, but avoid pulling on them too hard.
If you encounter resistance, dig a little deeper to avoid breaking the tubers in the soil.
Depending on the size of your growing bag, you may need to harvest the potatoes in batches.
Larger bags can accommodate more tubers, so it may take a little more time and effort to remove all of the potatoes.
5. Handling the Harvested Sweet Potatoes:
Once you have all the sweet potatoes removed, place them on a clean surface where you can inspect them.
Look for any damages such as cuts or bruises, which can affect their storage life.
It’s normal to find some dirt stuck to the tubers; you just gently wipe it off with your hands or a soft cloth.
Curing and Storing Sweet Potatoes
After harvesting, sweet potatoes need to be cured before they can be stored long-term. Curing helps to enhance their flavor and sweetness, so it’s an essential step.
Curing Process:
Place your harvested sweet potatoes in a warm, dry area for 2-3 weeks. The temperature should be between 80-85°F (27-29°C) with moderate humidity.
A sunny windowsill or a warm room works best. Avoid exposing them to direct sunlight, as this can cause the skin to become sunburned.
Curing also allows the skin to harden, which helps protect the sweet potatoes during storage.
Storage Conditions:
After curing, move the sweet potatoes to a cool, dark place with good air circulation. The ideal storage temperature is between 55-60°F (13-15°C).
A root cellar or cool basement is perfect for this. Avoid storing sweet potatoes in the fridge, as this can damage their flavor and texture.
If stored properly, sweet potatoes can last for several months.
Troubleshooting Common Issues
While growing sweet potatoes in a bag is relatively easy, gardeners may occasionally face some challenges.
Being prepared to deal with potential problems can help ensure a successful harvest. Here are some of the most common issues you might encounter and how to troubleshoot them.
1. Pests and Diseases
Although sweet potatoes are generally resistant to pests and diseases, they can still be affected by common garden pests and conditions that can interfere with their growth.
- Aphids and Whiteflies:
Aphids and whiteflies are common pests that feed on the leaves and stems of sweet potatoes. They can weaken the plant by sucking sap from the leaves, leading to yellowing or wilting.
To control these pests, you can use a mild insecticidal soap or spray your plants with a mixture of water and neem oil. You can also gently wash the leaves with water to remove aphids.
- Fungal Diseases (Root Rot):
Root rot is a common issue in damp, poorly drained soil. This can cause the sweet potato roots to become mushy, discolored, and eventually die.
To prevent root rot, ensure that your growing bag has sufficient drainage.
If you notice the soil in your bag becoming soggy, cut back on watering and allow the soil to dry out between waterings. You can also add sand or perlite to the soil mix to improve drainage.
If you notice signs of rot on your sweet potatoes while harvesting, discard the affected tubers to prevent the disease from spreading.
- Vine Borers:
Vine borers are pests that tunnel into the stems of sweet potato plants, causing the vines to wilt and die.
To control vine borers, inspect your plants regularly for small holes in the stems. If you find any, cut the affected stems back and remove them.
You can also try covering your sweet potatoes with row covers during the early stages of growth to prevent the larvae from accessing the vines.
2. Poor Growth or Wilting
If your sweet potatoes are not growing well or if the vines seem to be wilting, several factors could be at play. Here are some things to check:
- Too Little Sunlight:
Sweet potatoes thrive in full sunlight, so if your plants are not receiving enough light, they may become leggy, weak, or fail to produce tubers.
Make sure the bag is placed in a location where it receives at least 6-8 hours of sunlight per day. If the spot is too shady, try moving the bag to a sunnier location.
- Overwatering or Underwatering:
Sweet potatoes are sensitive to inconsistent moisture levels. If the soil is too wet, it can lead to root rot, while dry soil can cause the plants to wilt and stop growing.
Always check the soil before watering, and aim for consistent moisture.
Water deeply once a week or more often if needed, but ensure that the soil has good drainage to avoid waterlogging.
Nutrient Deficiency:
Sweet potatoes need a good amount of nutrients to grow well. If the leaves start turning yellow or if growth slows down, it could be a sign of nutrient deficiency.
To fix this, apply a balanced, organic fertilizer or amend the soil with compost. Make sure to follow the recommended application rates to avoid over-fertilizing.
3. Poor Yield or Small Tubers
If your sweet potatoes are producing very small tubers, it could be due to a few factors:
- Crowded Roots:
If you’ve planted too many slips in the bag, the roots may become crowded, preventing the tubers from growing large.
To remedy this, make sure to plant the slips with enough space between them – 12-18 inches apart.
- Inadequate Soil Quality:
Sweet potatoes need loose, well-draining soil to develop large tubers. If the soil is compacted, it can restrict root growth.
Consider adding more compost or organic matter to loosen the soil and improve its structure. You can also mix in sand or perlite to increase drainage.
- Temperature Stress:
Sweet potatoes prefer warm temperatures, and if they are exposed to cool conditions for too long, their growth may be stunted.
Make sure that the bag is placed in a warm location, especially during the early stages of growth.
Conclusion
Growing sweet potatoes in a bag is an easy and rewarding way to grow your own vegetables, even in limited space.
With the right materials, a little care, and some patience, you can enjoy a bountiful harvest of sweet, nutritious sweet potatoes.
Try this method next time you’re looking for a fun and space-saving gardening project!