
Over the years, I’ve learned that seed starting quietly shapes the entire growing season long before anything ever touches the garden soil.
When seeds fail, it’s rarely because the seed itself was bad, but because something small and overlooked at the beginning created stress that the plant never fully recovered from.
After losing trays of seedlings in my early years, I stopped treating seed starting like a quick task and started treating it like a foundation.
Now, when late winter arrives and I begin preparing to sow, I return to the same core setup I’ve trusted for years, adding only what has proven itself through repeated success and removing anything that created more trouble than help.
My Five Must-Have Items for Seed Starting
These are the five items I use every single season, without exception, because each one solves a problem I learned the hard way.
1. The Seed Tray I’ve Used for Over Five Years
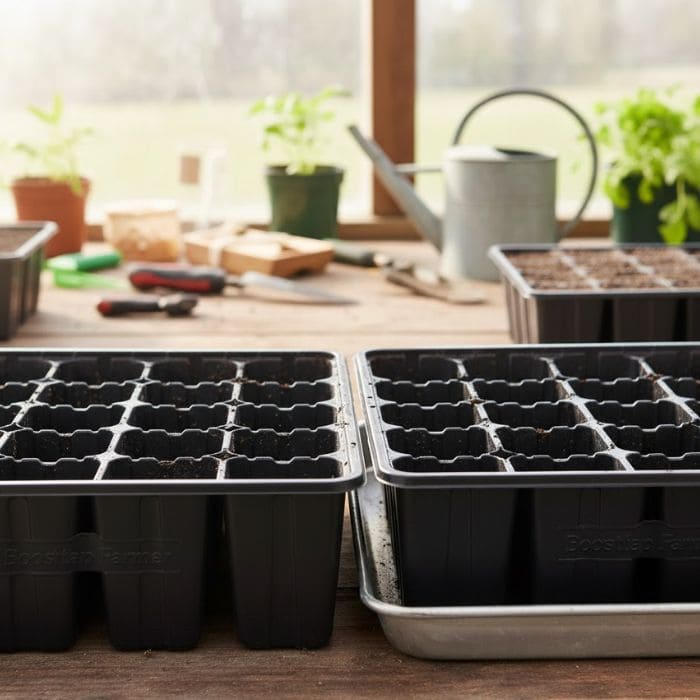
The seed tray is the backbone of my entire setup, and I still use the same heavy-duty trays I bought more than five years ago.
They are made from thick, rigid plastic that hasn’t cracked, bent, or become brittle, even after repeated washing, sun exposure, and storage between seasons.
The cells are deep enough to allow roots to grow downward naturally instead of curling early, which makes transplanting far less stressful for young plants.
I prefer trays with 32 to 72 cells, depending on what I’m sowing, because they strike the right balance between space and efficiency. Each cell drains well without losing soil, and that detail alone has saved countless seedlings from rot.
Over time, I’ve come to trust brands like Bootstrap Farmer, not because of marketing, but because their trays are built for repeated use rather than single seasons, and I usually order them directly online or through reliable garden suppliers.
2. A Properly Fitted Humidity Dome

I once believed humidity domes were optional, until a single season without one proved me wrong.
That year, I relied on misting alone, and the soil surface dried unevenly, some seeds sprouted too fast and collapsed, others never emerged at all, and nearly half the tray failed. Since then, I never skip the humidity dome during germination.
I always choose a dome that fits the tray exactly, not loosely and not too tight, because trapped humidity works best when it is evenly distributed.
Adjustable vents matter, because once seedlings emerge, slowly reducing humidity helps prevent damping-off and prepares plants for real conditions.
The dome only stays on during those early days, but during that window, it creates a stable environment seeds desperately need.
3. A Water Reservoir Tray for Bottom Watering
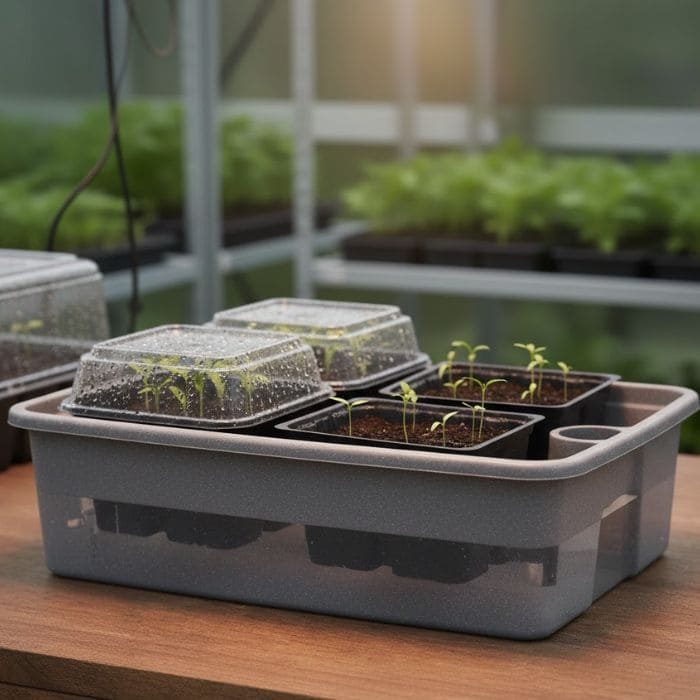
Every seed tray sits inside a water reservoir tray, and I do not start seeds without one anymore.
I first learned about bottom watering from a gardening book that explained how roots grow stronger when they are encouraged to reach downward for moisture rather than staying near the surface.
I was skeptical at first, but experience convinced me quickly. By watering from below, moisture stays consistent, soil remains loose, and delicate seedlings are never disturbed by top watering. Leaves stay dry, fungus pressure drops, and root systems develop more evenly.
I pour water into the bottom tray and let the soil absorb only what it needs, which has completely changed the health and structure of my seedlings.
4. My Seed Starting Mix and the Recipe I Rely On
Soil is where success truly begins, and over time I stopped depending entirely on store-bought mixes. I now blend my own seed starting mix, keeping it light, balanced, and gentle enough for fragile roots.
My mix follows a simple ratio that has worked consistently for me:
- 50 percent fine coco coir for even moisture retention
- 25 percent sifted compost for mild, slow nutrition
- 25 percent perlite for airflow and drainage
I mix everything slowly by hand until the texture feels loose and uniform, then pre-moisten it thoroughly before filling trays, making sure it is damp but never dripping. Dry pockets cause uneven germination, so I take time with this step.
I avoid adding fertilizer at this stage, because seeds already contain what they need to sprout, and too much nutrition too early leads to weak growth rather than strong roots.
5. Simple Garden Labels Made From Popsicle Sticks

Labels seem small, but they prevent confusion later when everything starts to look the same.
I make my own using plain wooden popsicle sticks, writing the plant name, variety, and sowing date with pencil or a weather-resistant marker. Pencil lasts longer outdoors than most inks, which surprised me at first.
I place the label gently into the corner of each tray so it doesn’t disturb roots later, and at the end of the season, I either reuse them or compost them.
This habit keeps my seed starting calm and organized, especially when I’m working with dozens of varieties at once.
Optional Items That Make Seed Starting Easier, Not Mandatory
Once the five essentials are in place, these tools help refine the process, especially in unpredictable early seasons.
Heat Mats for Warm-Loving Seeds
Heat mats have become invaluable for crops like tomatoes, peppers, and eggplants, especially when early spring temperatures remain unstable.
I place the trays on the mat and use a thermostat to maintain steady warmth, which leads to faster and more even germination. Once seedlings emerge, I remove the heat to prevent weak, leggy growth.
Grow Lights for Strong, Compact Seedlings
Even the brightest window light isn’t enough in late winter. After years of growing pale, stretched seedlings, I added simple grow lights positioned just a few inches above the trays, raising them gradually as plants grow.
I keep the lights on for 14 to 16 hours a day, and the difference in stem strength and leaf color is immediate.
Very Gentle Fertilizer for Later Stages
Once true leaves appear, I introduce a diluted liquid fertilizer, often compost tea or fish emulsion, used sparingly.
I keep it weak and infrequent, because seedlings need time more than they need food.