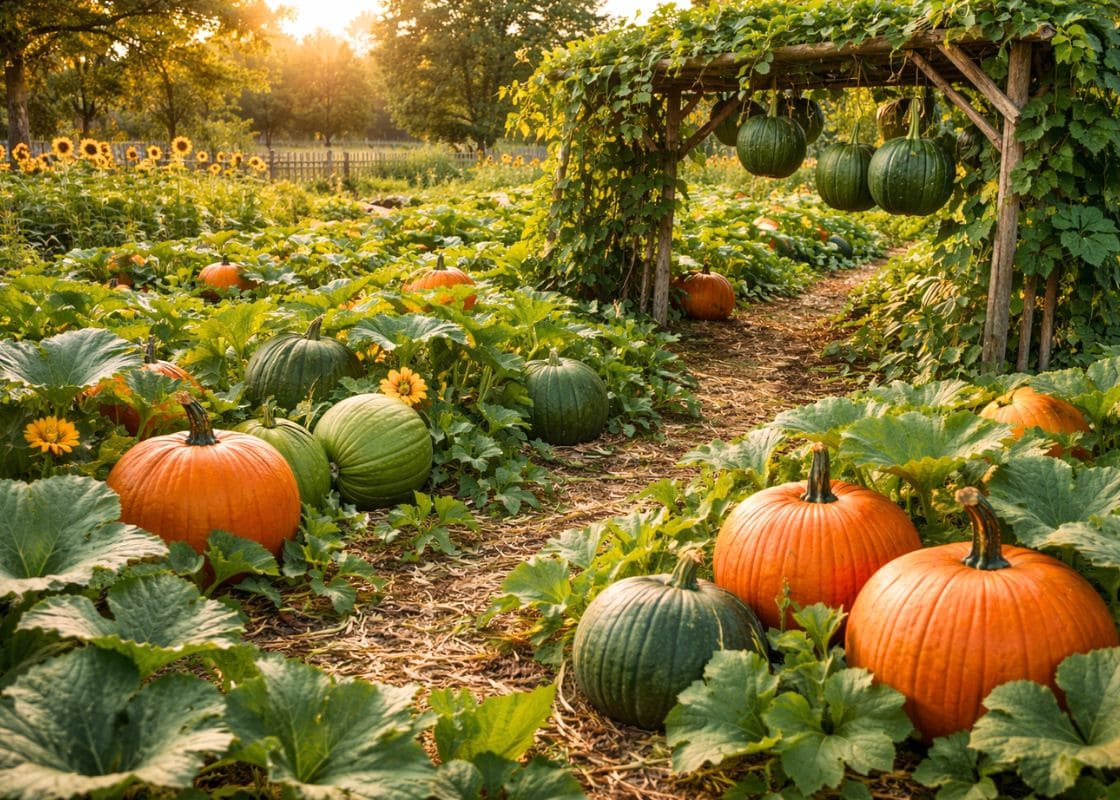
Pumpkins have become a popular garden favorite, especially in fall when they brighten up outdoor spaces.
Their vibrant color and versatility make them ideal for decorations, cooking, and even saving seeds for next season.
Growing pumpkins at home offers the satisfaction of a bountiful harvest, connecting you with nature and providing a tangible reward for your effort.
However, while pumpkins are fun to grow, they do come with challenges. From managing their sprawling vines to keeping pests at bay, cultivating pumpkins requires some care.
With the right knowledge and techniques, anyone can grow pumpkins successfully and enjoy their many uses.
Choosing the Right Pumpkin Varieties
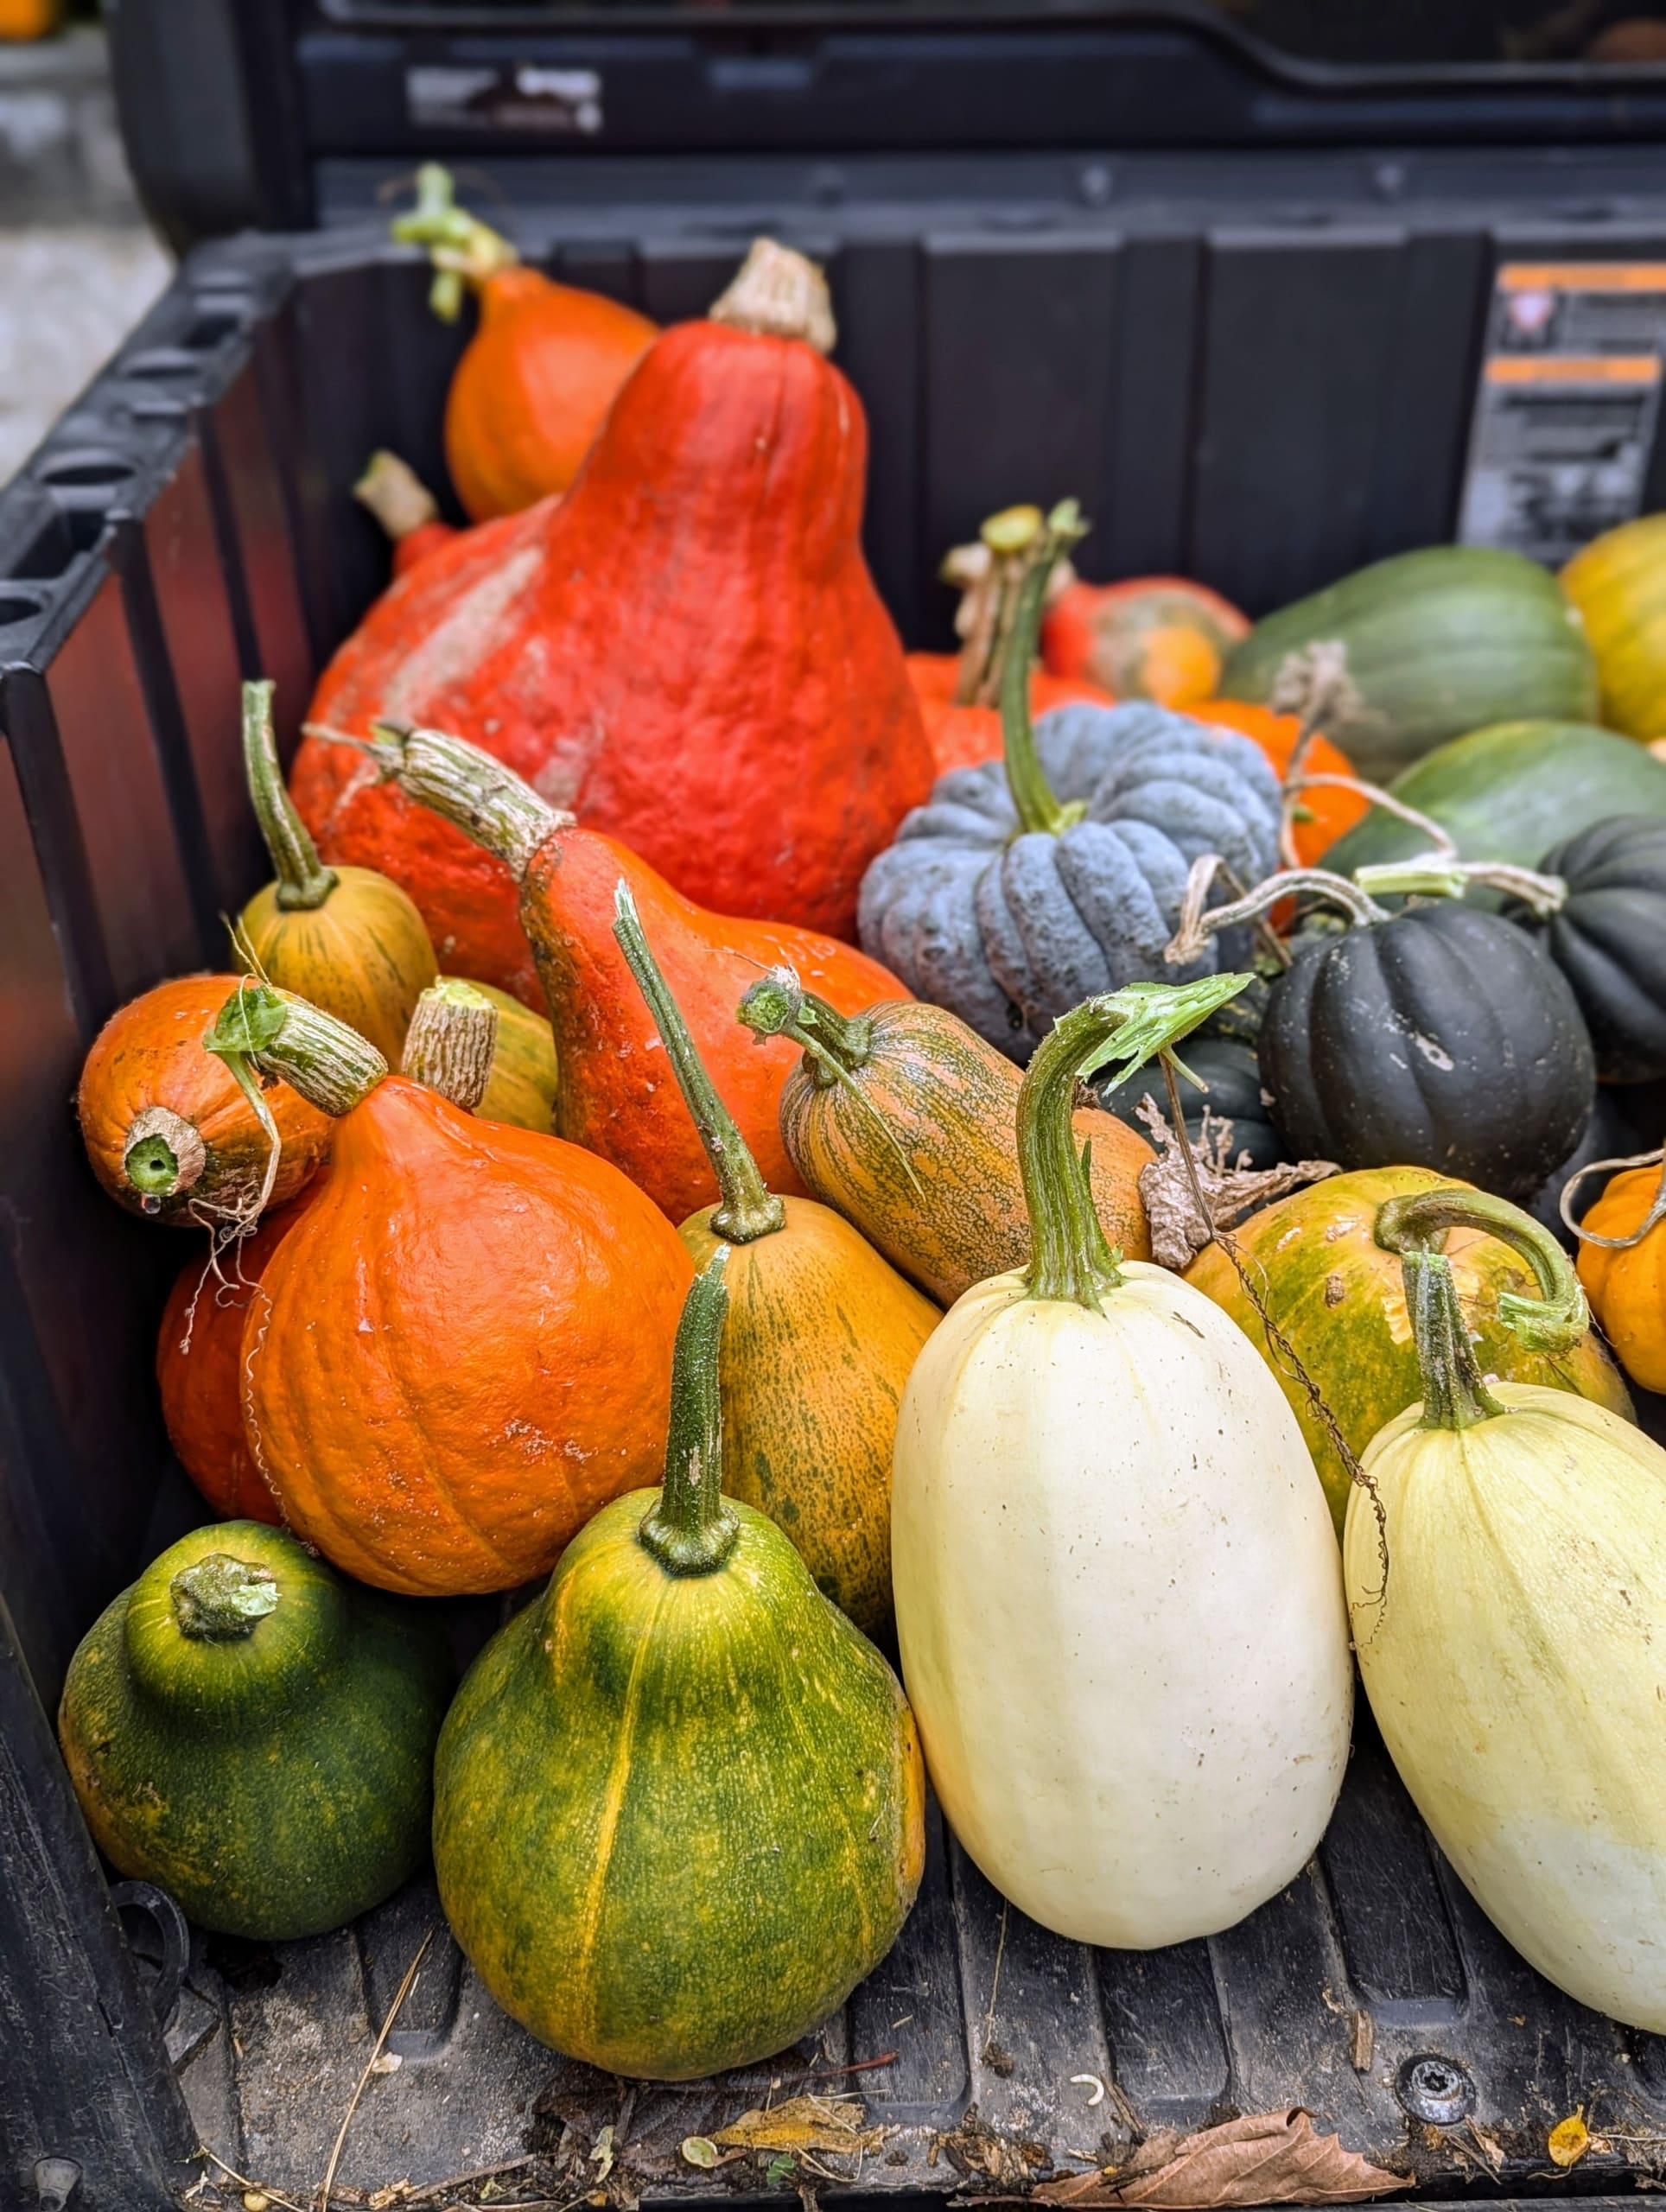
When selecting pumpkin varieties for your garden, it’s essential to consider both the purpose of the pumpkins and the space available for growing them.
There are several different types of pumpkins, each suited to different needs:
- Carving pumpkins: These are large, round pumpkins with a thick rind, perfect for Halloween. Varieties like Jack O’ Lantern and Howden are classic choices for carving.
- Ornamental pumpkins: These pumpkins come in unique shapes, sizes, and colors, perfect for fall displays. Varieties such as Mini White, Jarradale, and Baby Boo are popular for ornamental purposes.
- Culinary pumpkins: These pumpkins are smaller, with sweet, flavorful flesh ideal for cooking and baking. Varieties like Sugar Pie and Cinderella are known for their sweet taste and smooth texture.
- Heirloom pumpkins: If you prefer growing pumpkins with a rich history, heirloom varieties like Long Island Cheese or Blue Hubbard are great choices. They offer unique shapes and flavors while preserving the heritage of pumpkin cultivation.
When choosing the right pumpkin variety, consider your garden’s space.
Carving pumpkins require more space to grow, while smaller varieties like Baby Boo or Sugar Pie can thrive in smaller garden beds or containers.
Additionally, think about the growing season as some varieties take longer to mature than others, so be sure to select ones that will reach maturity in your climate.
Preparing Your Garden for Pumpkin Growth
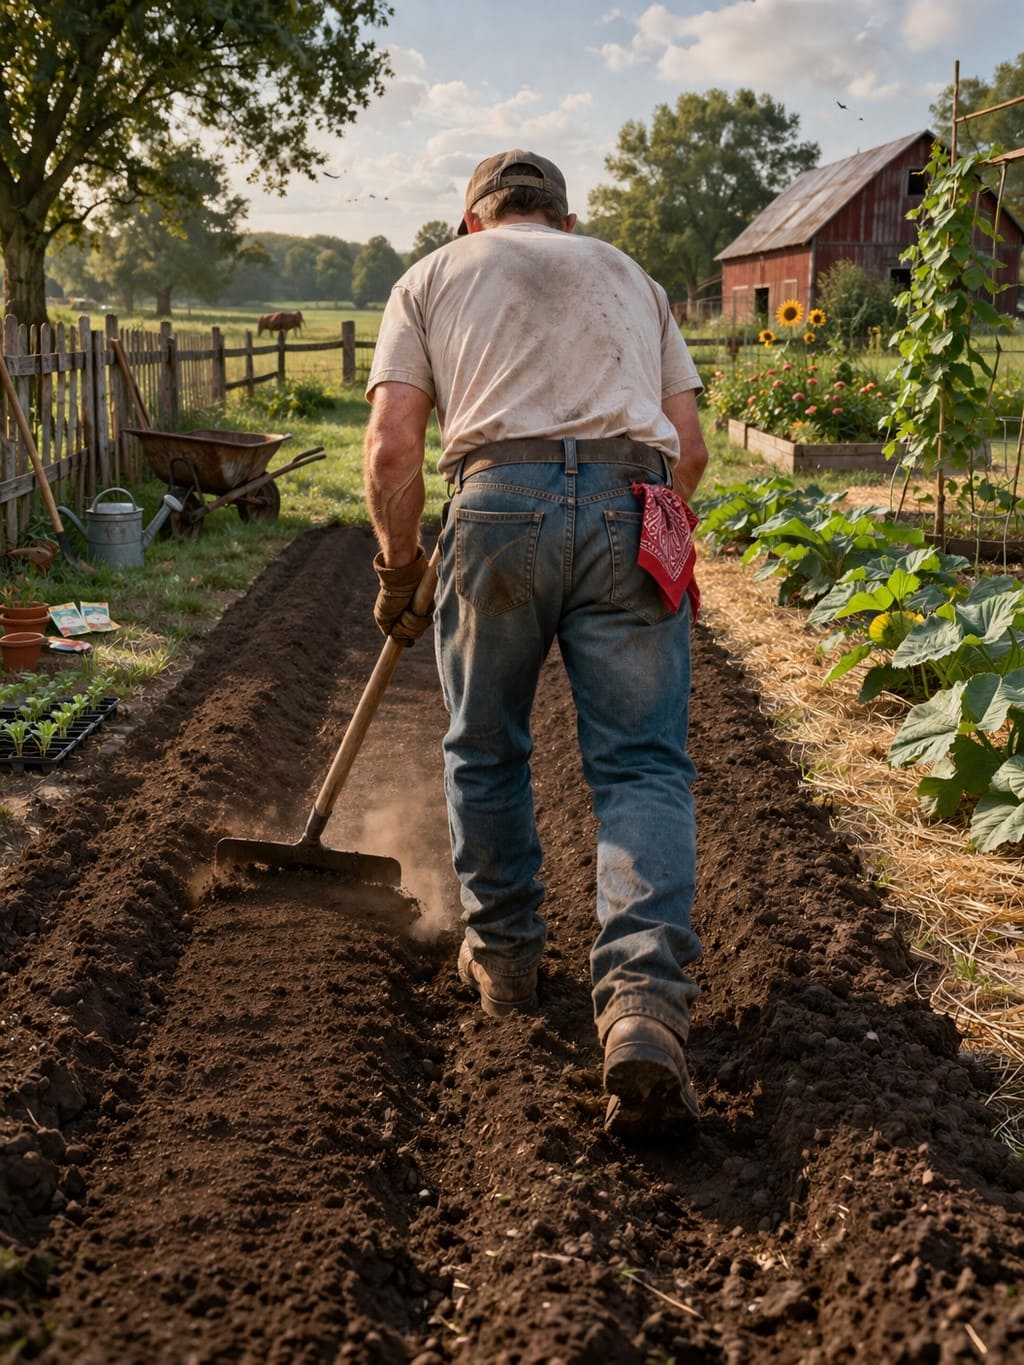
Soil preparation is a crucial step for successful pumpkin growth.
Pumpkins are heavy feeders, meaning they require nutrient-rich, well-drained soil to grow strong and produce healthy fruit. Here’s how you can prepare your garden for pumpkins:
1. Soil Preparation
Before planting, test your soil to determine its pH level and nutrient content. Pumpkins prefer slightly acidic to neutral soil with a pH of 6.0 to 7.0.
You can improve the soil by adding organic matter like compost, well-rotted manure, or aged leaves to increase fertility and help with soil structure.
Make sure the soil is loose and well-draining to avoid waterlogged roots, which can lead to rot.
2. Choosing the Right Planting Site
Pumpkins thrive in full sunlight, so choose a location in your garden that gets at least 6-8 hours of direct sun each day.
Additionally, pumpkins need ample space to spread out, as their vines can grow quite long. If space is limited, consider growing small pumpkin varieties in containers or raised beds.
3. Soil Testing and Amendment
Soil testing helps you identify any nutrient deficiencies. A balanced fertilizer with a higher level of phosphorus and potassium is ideal for pumpkins.
Apply the necessary amendments to ensure your soil is rich in nutrients, promoting healthy vine growth and fruit production.
4. Creating Raised Beds or Mounds
Pumpkins need well-draining soil to thrive. If your garden soil is heavy or clay-like, consider creating raised beds or mounds to improve drainage.
Raised beds not only allow for better drainage but also help keep the roots warm, promoting early growth.
If you prefer, you can plant pumpkins directly in mounds, forming small hills of soil about 12-18 inches high to allow for good drainage and air circulation.
When to Plant Pumpkins
The timing of planting your pumpkins plays a critical role in the success of your harvest.
Pumpkins thrive in warm conditions, so it’s essential to wait for the frost-free period in your region to ensure they grow without interruption.
Here are more details about when to plant pumpkins based on climate and region:
Frost-Free Periods:
Pumpkins are sensitive to frost, which can kill young plants or stunt their growth.
The ideal time to plant pumpkins is when the danger of frost has passed, and the soil has warmed sufficiently. You should wait for the soil to reach at least 65°F (18°C) before planting.
Frost-free dates vary based on location, so it’s important to know when the last expected frost occurs in your area.
You can find this information through local gardening resources, agricultural extensions, or online tools like the USDA Plant Hardiness Zone Map.
Regional Planting Times:
Northern U.S. (Zones 3-5)
In cooler climates, it’s best to start pumpkin seeds indoors 3-4 weeks before the last frost date.
This gives the plants a head start, allowing them to be ready for transplanting into the garden after the frost risk is gone.
Typically, this would mean planting seeds indoors in early to mid-April, then transplanting outdoors around mid to late May.
Central U.S. (Zones 5-7)
In these regions, you can directly sow pumpkin seeds into the garden once the soil temperature consistently stays above 65°F.
This usually happens in mid to late May. Be sure to avoid planting too early, as cold soil can impede germination and stunt growth.
Southern U.S. (Zones 8-10)
The longer growing season in these areas allows you to plant pumpkins earlier.
In many Southern regions, you can plant directly into the garden as early as late March to early April. However, it’s still essential to avoid planting before the last frost date.
Best Planting Date Tips:
Soil temperature is more important than air temperature when it comes to planting pumpkins.
To ensure proper germination, the soil should be consistently warm, not just the air. Use a soil thermometer to monitor the temperature before planting.
Additionally, check local gardening resources or consult your USDA hardiness zone for the best planting dates for your specific area.
Many gardening websites or extension services have tailored planting guides for your region.
Planting Pumpkins
Seed vs. Starter Plant: Which is Better?
Seed
Growing pumpkins from seed is the most common method, especially for gardeners who have a longer growing season.
Pumpkin seeds are large, making them easy to handle, and they produce stronger plants when sown directly in the soil.
The seeds can be planted directly into the garden, which helps to avoid transplant shock.
However, if you live in an area with a short growing season, starting seeds indoors may be a better option.
Starter Plants
If you live in a cooler climate or want to ensure an earlier harvest, starting pumpkin seeds indoors about 3-4 weeks before the last frost date gives you a head start.
Transplanting seedlings into the garden allows you to maximize your growing time, but you must be careful to harden them off gradually to prevent shock.
For many gardeners, using starter plants helps them avoid the unpredictability of direct seed sowing, especially when dealing with late spring frosts.
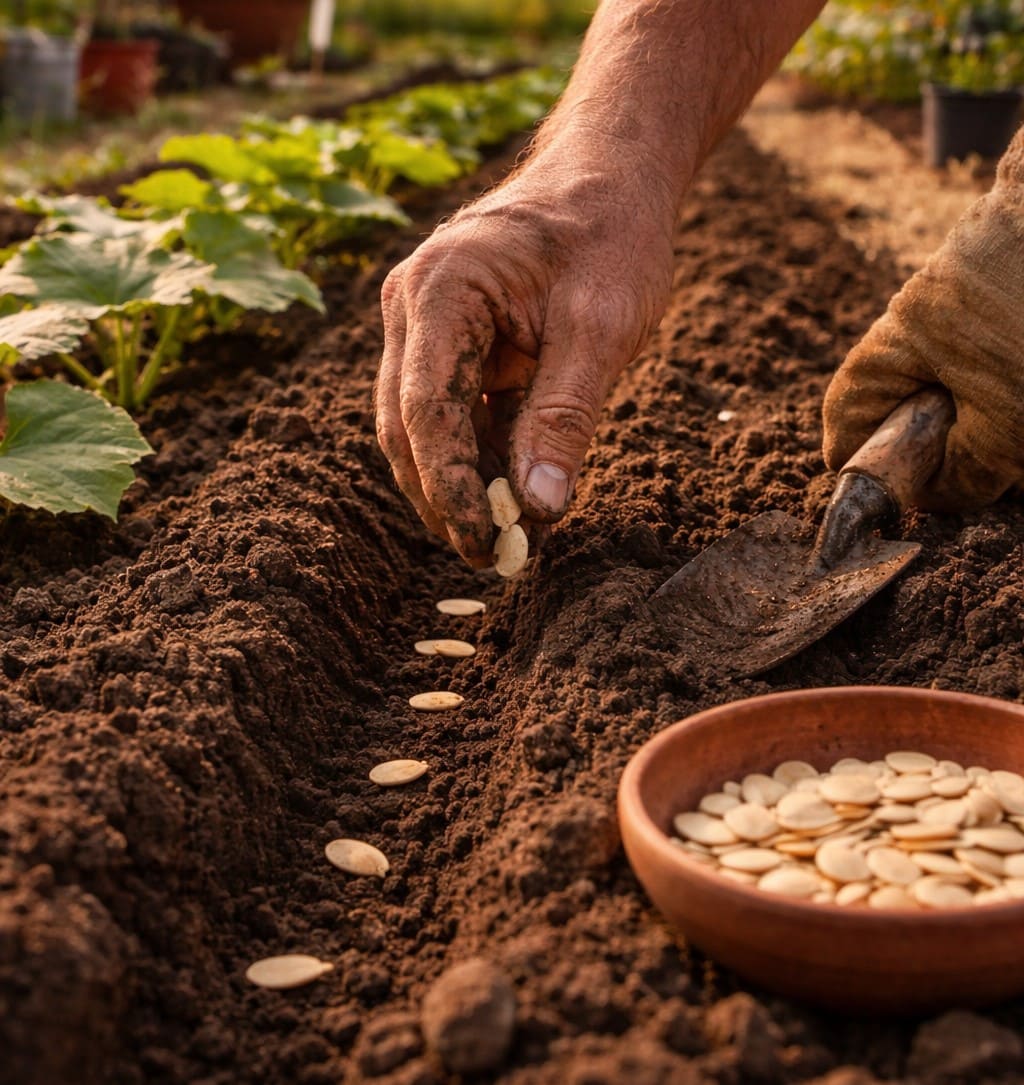
How to Plant Pumpkin Seeds
Pumpkin seeds should be planted 1 to 2 inches deep in the soil to ensure that they have enough coverage for germination.
Planting too deep can hinder germination, while planting too shallow may expose the seeds to drying out.
Proper spacing is vital for pumpkin growth. For larger varieties, like Jack O’ Lantern, space seeds 36 to 42 inches apart. This allows the vines to spread freely without overcrowding.
For smaller varieties, like Sugar Pie pumpkins, you can plant them 24 to 30 inches apart.
If planting in rows, make sure the rows are spaced about 5 to 6 feet apart to accommodate the vines.
Growing tips: The rows should be oriented north to south to maximize sun exposure throughout the day.
Transplanting Seedlings into the Garden
If you have started your seeds indoors, ensure that your seedlings are at least 2-3 weeks old and have 2-3 sets of true leaves before transplanting.
When transplanting, dig a hole that is deep enough to accommodate the root ball, ensuring the plant is set at the same depth it was growing indoors.
Be careful not to disturb the roots too much during transplanting. Then water the plants immediately after transplanting to help them settle into their new environment.
Companion Planting
Companion planting is a great way to enhance pumpkin growth and protect your plants from pests.
Some plants naturally benefit pumpkins, while others help deter harmful insects.
- Corn: Corn makes a great companion plant for pumpkins because its tall stalks can provide natural shade for pumpkin vines, especially during the hot summer months. Additionally, pumpkins benefit from the nitrogen corn adds to the soil.
- Beans: Beans, particularly pole beans, can be planted near pumpkins to help fix nitrogen in the soil, which is beneficial for pumpkin growth. Beans can also climb the corn stalks, creating a natural three-tiered garden.
- Marigolds: Marigolds are known for their pest-repelling properties. By planting marigolds around your pumpkin patch, you can reduce the likelihood of aphids, nematodes, and other pests that typically target pumpkins.
- Radishes: Radishes are excellent for breaking up compacted soil and can be planted in between pumpkin vines. Additionally, radishes can act as a natural pest deterrent by attracting pests away from your pumpkins.
Watering Pumpkins for Optimal Growth
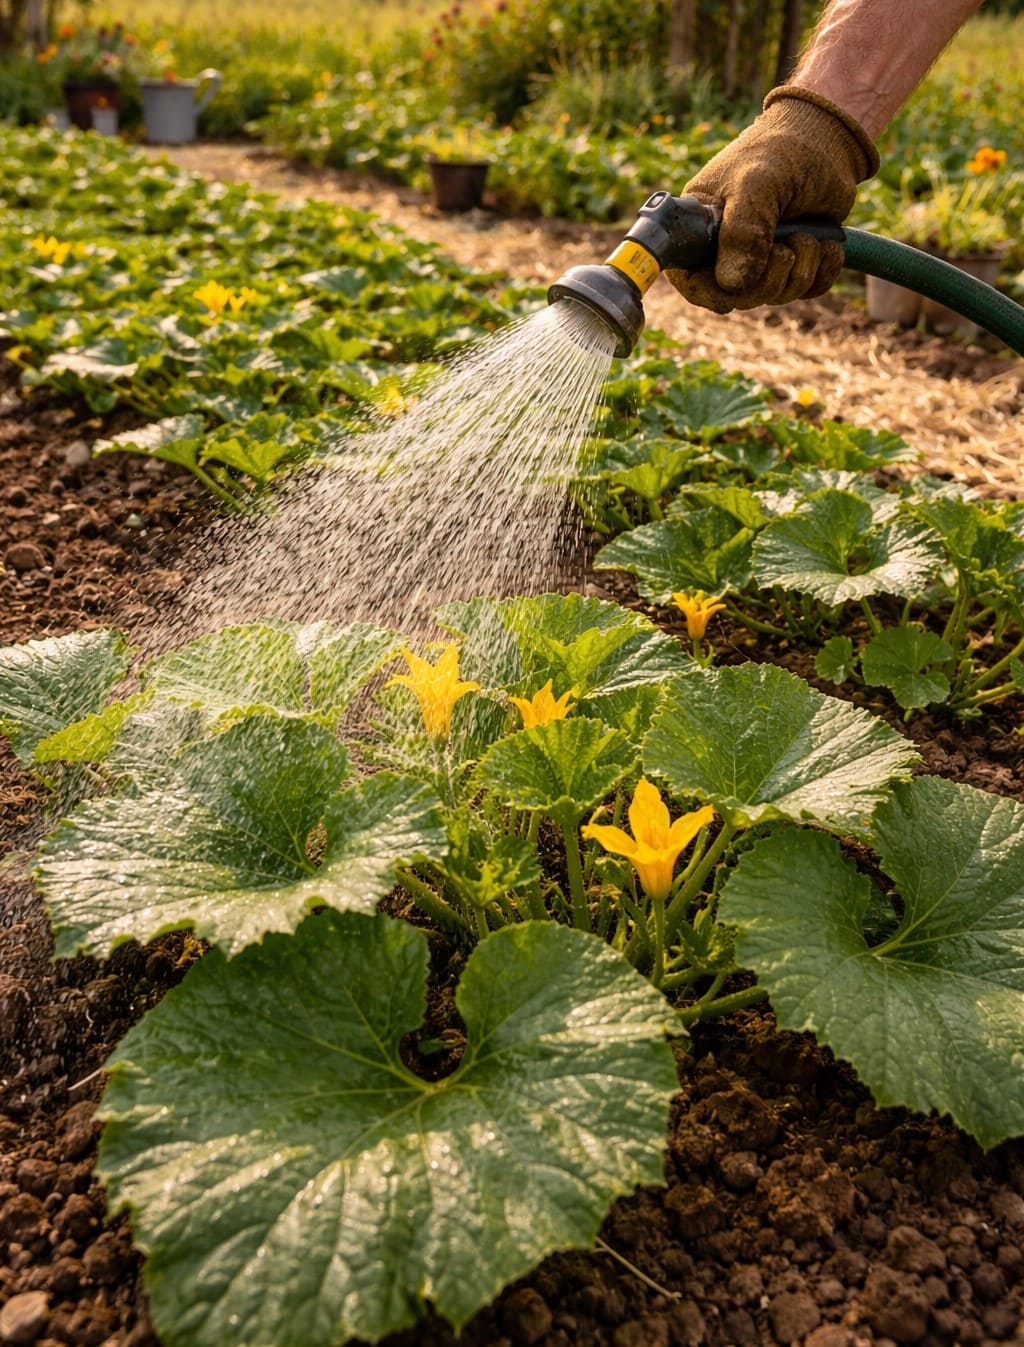
Best Watering Practices:
Water your pumpkins regularly, aiming for at least 1-2 inches of water per week. During dry spells or hot weather, you may need to increase watering frequency.
Drip irrigation or soaker hoses are ideal for pumpkins, as they provide consistent moisture to the roots while keeping the foliage dry.
This helps prevent the spread of fungal diseases like powdery mildew.
Preventing Water Stress:
Water stress can cause pumpkins to develop poorly or even abort their fruit. To avoid this, ensure the plants receive consistent moisture, especially during fruit development.
Irregular watering, such as periods of drought followed by heavy watering, can also lead to cracking and rot in pumpkins.
How Much Water Do Pumpkins Need?
On average, pumpkins require about 1 inch of water per week during the growing season.
During the fruiting stage, this may increase to 1.5 inches per week. It’s important to water deeply and consistently to encourage strong root development and healthy fruit growth.
Fertilizing and Feeding Pumpkins
Pumpkins are heavy feeders, meaning they require a significant amount of nutrients to thrive.
Proper fertilization ensures they have the energy needed for strong vine growth, flowering, and fruit production.
The key nutrients for pumpkins are nitrogen, phosphorus, potassium, and micronutrients.
These elements are essential for various functions, such as promoting strong leaf growth (nitrogen), root development (phosphorus), and overall plant health (potassium).
Organic vs. Synthetic Fertilizers:
- Organic fertilizers such as compost, fish emulsion, or well-rotted manure provide a steady release of nutrients and improve soil structure over time. These are beneficial for the long-term health of the soil.
- Synthetic fertilizers typically offer a quick nutrient boost, but they can sometimes lead to nutrient imbalances if overused. Choose a balanced fertilizer with a ratio such as 10-10-10 (NPK) or 5-10-10 to provide the right mix of nutrients for pumpkin growth.
Timing of Fertilization:
- Apply balanced fertilizer when you first plant your seeds or seedlings.
- Once the vines begin to spread, apply additional fertilizer high in phosphorus and potassium to encourage flowering and fruit development.
- You can also apply a liquid fertilizer or compost tea throughout the growing season to maintain nutrient levels.
Incorporating compost or other organic matter into your soil before planting provides an excellent source of nutrients.
It also helps retain moisture and improves soil structure, both of which are vital for pumpkin growth.
Supporting Pumpkin Vines and Managing Growth
Pumpkin vines are sprawling plants, and managing their growth is essential for a successful harvest.
Proper support and spacing allow the plants to thrive, while minimizing disease risks and ensuring better fruit production.
Pumpkin Vine Growth Patterns:
Pumpkins naturally grow in long vines that spread across the ground. Left unchecked, they can quickly overtake a garden space.
It’s important to give your pumpkins enough room to spread out, but also to control their growth for ease of care and harvesting.
Using Trellises or Supports:
If you’re growing smaller pumpkin varieties, consider using a trellis or other support structures to encourage vertical growth.
This saves space and prevents the fruit from sitting directly on the ground, reducing the risk of rot.
Make sure the trellis is sturdy enough to support the weight of the pumpkins as they grow.
You can also use slings made of cloth or nylon to support the larger pumpkins if they’re grown on trellises.
Mulching to Retain Moisture and Prevent Weeds:
Mulching around your pumpkin plants helps retain moisture in the soil, which is particularly important in hot weather.
It also prevents weeds from competing with your pumpkins for nutrients and water.
Use organic mulch like straw, grass clippings, or leaves, which will eventually break down and enrich the soil.
Pruning and Thinning Pumpkin Plants:
Pruning pumpkin vines encourages better airflow, which helps reduce the risk of disease.
Remove excess leaves and dead growth to allow sunlight to reach the plant’s base and improve fruit set.
Thinning pumpkin vines also helps the plant focus energy on fruit development instead of excessive vine growth.
Additionally, thinning allows for better spacing between pumpkins, helping to prevent overcrowding and ensuring that each fruit has enough room to grow to full size.
Pest and Disease Management
Common Pests That Affect Pumpkins:
- Squash Bugs: These pests feed on the leaves and stems of pumpkin plants, causing wilting and yellowing. They can quickly damage your plants, particularly during hot summer months. Look for brown, shield-shaped bugs and their eggs on the undersides of leaves.
- Cucumber Beetles: These beetles are carriers of bacterial wilt, which can quickly kill pumpkin plants. They also feed on pumpkin leaves, creating holes and discoloration. Look for small, yellow and green striped beetles.
- Aphids: These tiny insects suck sap from pumpkin leaves and stems, weakening the plant. They can also transmit viruses. Check for clusters of aphids on young leaves and undersides of stems, often accompanied by a sticky residue known as “honeydew.”
Preventing Pest Infestations:
- Regular Inspection: Monitor your pumpkin plants regularly for early signs of pest infestations. Early detection allows for quicker intervention.
- Natural Remedies for Pest Control: Use natural predators such as ladybugs, which feast on aphids. You can also introduce parasitic wasps to target squash bugs. Neem oil and insecticidal soap are effective organic treatments for controlling pests without harming beneficial insects.
- Diatomaceous Earth: This natural substance can be sprinkled around the base of your plants to help control pests like aphids and cucumber beetles.
- Row Covers: Using floating row covers can prevent pests from reaching the plants in the early stages, though you’ll need to remove them when flowers begin to bloom for pollination.
Diseases That Affect Pumpkins:
- Powdery Mildew: This fungal disease appears as white, powdery spots on leaves, leading to yellowing and eventual death of the plant. It’s more common during hot, dry conditions and can be managed with fungicide sprays or by using resistant varieties.
- Downy Mildew: Characterized by yellow spots on leaves and a grayish, fuzzy growth on the underside, downy mildew thrives in humid, wet conditions. Remove infected leaves promptly, and avoid overhead watering to reduce moisture on foliage.
- Fungal Infections: Fungal diseases like root rot or wilt can affect pumpkins if the plants are overwatered or grown in poorly draining soil. Ensure your soil has proper drainage and avoid watering directly onto the leaves.
Organic Treatments and Integrated Pest Management (IPM):
IPM is a sustainable approach to managing pests using a combination of methods such as biological controls, organic treatments, and cultural practices.
The goal is to manage pest populations without relying heavily on chemical pesticides, which can harm beneficial insects.
For fungal diseases, use organic fungicides like copper or sulfur-based solutions.
Also, remove infected plant parts to reduce the spread of disease and allow for better air circulation.
Plus, rotate pumpkin crops each year to prevent soil-borne diseases and pests from establishing themselves.
Pollination and Fruit Setting
The Importance of Pollination for Pumpkin Fruit Set:
Pumpkin plants have separate male and female flowers. Only the female flowers will produce fruit, but they need pollen from the male flowers to do so.
Pollinators like bees are essential for transferring pollen between the flowers.
Inadequate pollination often results in the development of small, misshapen, or empty pumpkins, or no pumpkins at all.
How to Identify Male and Female Pumpkin Flowers:
- Male Flowers: These are the first to appear on the plant and are typically located at the end of the vines. They have a long, thin stem and a smaller flower.
- Female Flowers: These have a swollen base that looks like a tiny pumpkin. The female flowers bloom after the male flowers and are the ones that will develop into pumpkins if pollinated.
Hand-Pollination Techniques If Natural Pollination Is Insufficient:
If your garden lacks sufficient pollinators, you can hand-pollinate pumpkins to ensure fruit set:
- Choose a male flower that has just opened and gently remove the petals to expose the stamen.
- Use a small paintbrush or cotton swab to collect the pollen from the male flower.
- Transfer the pollen to the stigma (the sticky part) of the female flower.
- If done correctly, the female flower will start to swell and form fruit within a few days.
To attract more pollinators to your pumpkin patch, plant flowers such as sunflowers, marigolds, lavender, and borage nearby.
These plants will attract bees, butterflies, and other beneficial insects that will help pollinate not only your pumpkins but also other plants in your garden.
Harvesting Pumpkins
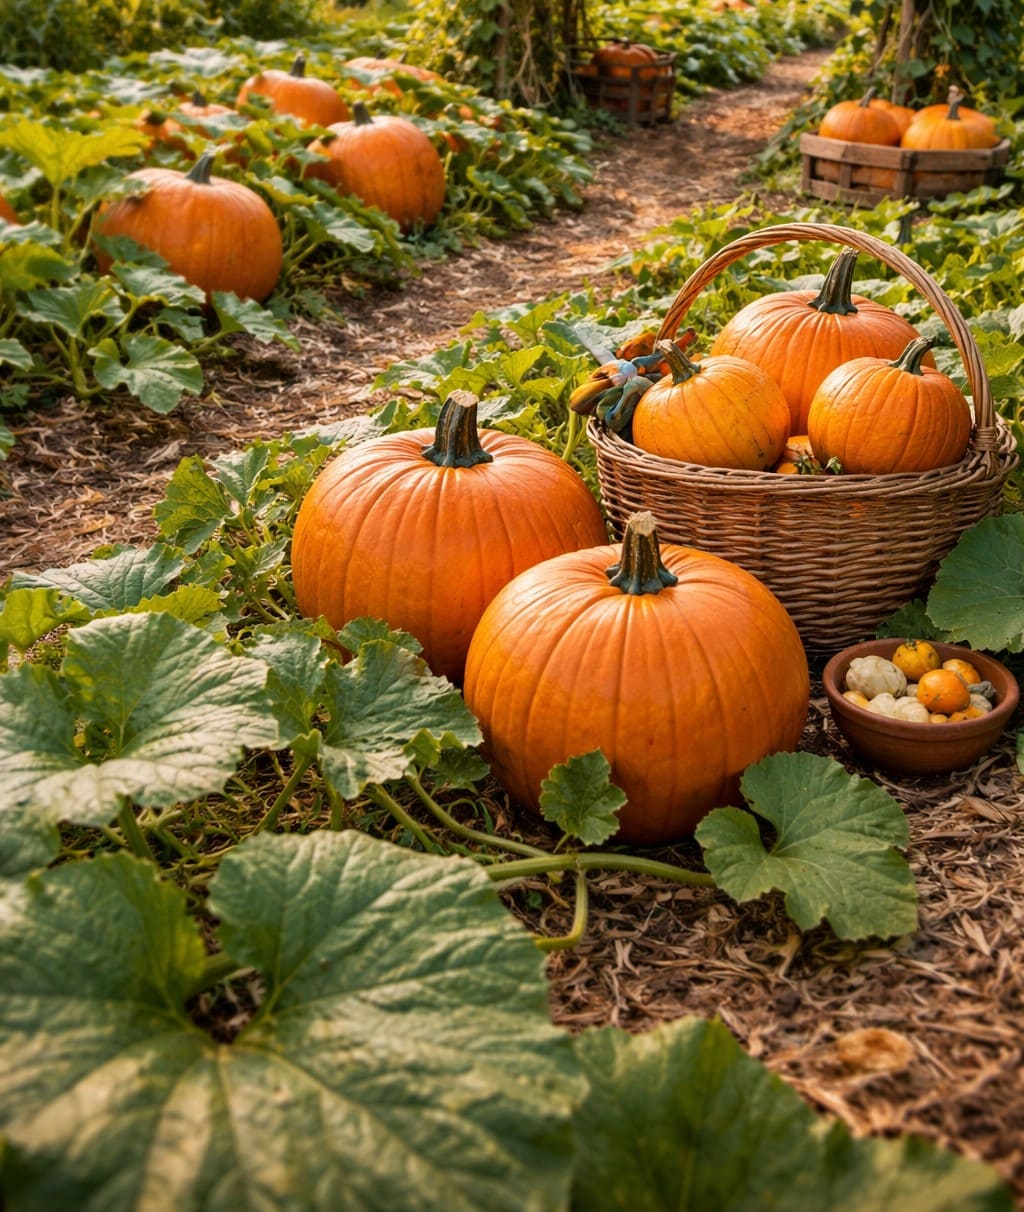
When to Harvest Pumpkins: Signs of Maturity:
- Color: The pumpkin should have a deep, rich color, typically orange for most varieties, but can be white, green, or yellow for others.
- Skin Toughness: The skin should be firm and hard when you press on it. You should not be able to easily puncture the skin with your fingernail.
- Stem: The stem should be brown, dry, and hard. A green stem indicates the pumpkin is not fully mature.
- Sound: When you tap a ripe pumpkin, it will produce a hollow sound, indicating it is ready for harvest.
How to Properly Harvest Pumpkins:
- Cut the stem of the pumpkin with a sharp knife or pruning shears, leaving a few inches of stem attached. Do not pull the pumpkin off the vine, as this can cause damage.
- Handle carefully to avoid bruising or damaging the pumpkin’s skin. If you cut the pumpkin, it will not store well.
- Clean the pumpkin by wiping it with a damp cloth to remove dirt, but avoid submerging it in water, as this can cause it to rot faster.
Harvesting for Different Purposes:
If you’re growing pumpkins for cooking, harvest them as soon as they reach the desired size and ripeness. For culinary pumpkins like Sugar Pie, wait until the skin is firm and the stem is dry.
For ornamental pumpkins, harvest them when they are fully colored, but before they are overripe. Overripe pumpkins may begin to rot or soften and are not suitable for decoration.
To save seeds for next season, allow one or two pumpkins to remain on the vine until fully mature. After harvesting, scoop out the seeds, wash them thoroughly, and let them dry before storing in a cool, dry place.
Storing and Curing Pumpkins
Proper Curing Techniques for Pumpkins:
Curing pumpkins helps harden the skin and heal any minor cuts or bruises, which increases their ability to withstand storage. To cure pumpkins:
- Place pumpkins in a warm, dry area, ideally with temperatures between 80°F to 85°F (27°C to 29°C) for 10 to 14 days.
- Make sure the pumpkins are kept off the ground to avoid moisture absorption and potential mold growth. You can place them on shelves or a clean tarp.
- Cure the pumpkins in a space that is dry, with good air circulation, and out of direct sunlight to avoid sunburn.
Storing Pumpkins in the Right Conditions:
Once the pumpkins have cured, store them in a cool, dry location with temperatures ranging between 50°F to 60°F (10°C to 15°C).
Proper humidity levels should be low, around 50-60%, to prevent mold and decay. Avoid storing pumpkins in places that are too humid or too warm, as this can shorten their shelf life.
You should use wooden crates, shelves, or bins to store pumpkins in a well-ventilated area. Avoid stacking pumpkins on top of each other, as this can cause bruising and reduce storage time.
How Long Pumpkins Last After Harvest:
With proper curing and storage, pumpkins can last anywhere from 2 to 3 months, depending on the variety and the conditions in which they’re stored.
Some varieties, like Winter Luxury, can last up to 6 months or more, while others may have a shorter shelf life.
Preparing Pumpkins for Winter Storage:
For winter storage, pumpkins should be checked periodically for any signs of rot.
If you find any that have soft spots, discard them to prevent them from affecting the others.
Handle pumpkins gently to avoid bruising, and ensure that they remain in a consistent temperature range throughout the winter.
Troubleshooting: Common Problems and Solutions
1. Poor Fruit Production
It can be caused by insufficient pollination, poor soil nutrition, or inadequate sunlight.
Ensure that your pumpkin plants are receiving enough sun (at least 6-8 hours of full sunlight per day).
If natural pollinators are lacking, try hand-pollinating or planting pollinator-friendly flowers nearby to attract bees.
Also, check your soil for nutrient deficiencies and amend it with compost or balanced fertilizer.
2. Yellowing Leaves
Yellowing leaves may indicate nutrient deficiencies, particularly a lack of nitrogen, or overwatering.
If nitrogen deficiency is the problem, apply a nitrogen-rich fertilizer, such as compost or a balanced organic fertilizer.
Ensure your pumpkins are not overwatered, as soggy soil can cause root rot and affect the leaves.
3. Weak Vines
Possible causes are poor soil, inadequate sunlight, or stress from pests or diseases.
Ensure your pumpkins are growing in nutrient-rich, well-draining soil. If vines are weak, apply a balanced fertilizer and ensure the plants receive enough sunlight.
Additionally, check for pests like aphids or powdery mildew, which can weaken vines, and treat them promptly.
Tips for Better Pumpkin Harvests Next Season:
- Rotate your crops each year to reduce the buildup of soil-borne diseases and pests.
- Use organic mulch around the base of your pumpkin plants to retain moisture and suppress weeds.
- Invest in organic pest management practices, like companion planting or using row covers, to reduce reliance on chemicals.
- Keep track of your planting and harvesting dates to improve timing for next season’s growing cycle.
Conclusion
Successfully growing pumpkins requires careful planning, consistent care, and attention to detail, but the rewards are well worth the effort.
Remember that pumpkins are resilient plants, but they need the right environment to thrive.
By addressing common issues, from poor pollination to pest infestations, you can avoid pitfalls and enjoy a bumper harvest.
Embrace the joys of pumpkin gardening, and look forward to watching your garden transform into a thriving patch filled with vibrant pumpkins.